How to Set Up and Use Letterly Dictation on iPhone

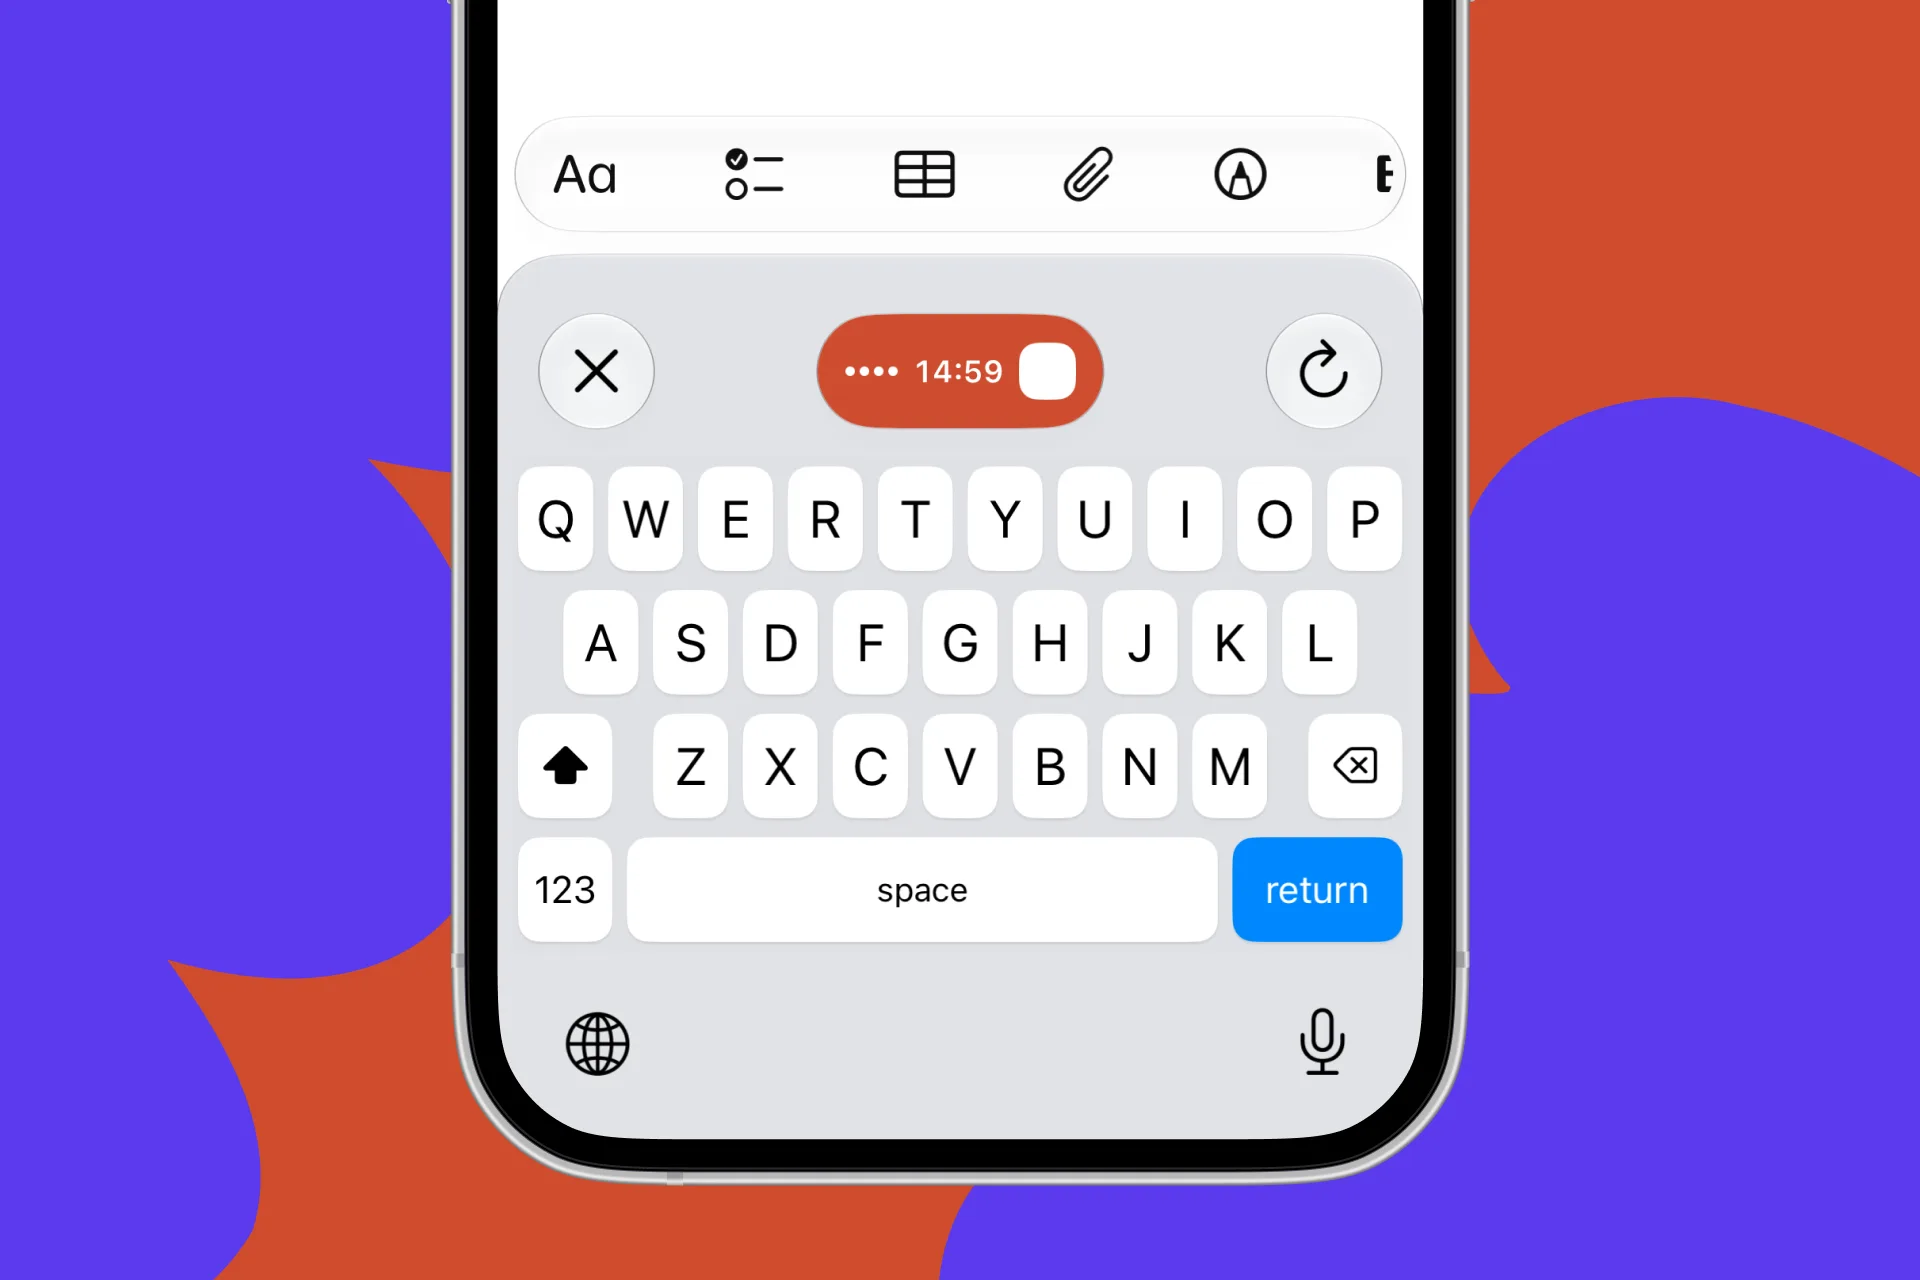
We brought Letterly beyond the app.
Now, with Letterly Keyboard, you can dictate wherever you already write on your iPhone, without even opening Letterly first.
Add the keyboard once, then use your voice in Word, Messages, Mail, Notes, WhatsApp, ChatGPT, and more. Just switch to Letterly Keyboard, tap the microphone, and start speaking and get clean, ready-to-use text right where you need it.
You can use it to write messages faster, turn messy thoughts into clear notes, draft emails on the go, or quickly capture ideas before you forget them.
We’ve split this guide into three parts:
Let’s get started 👇
I. Set up the Letterly Dictation
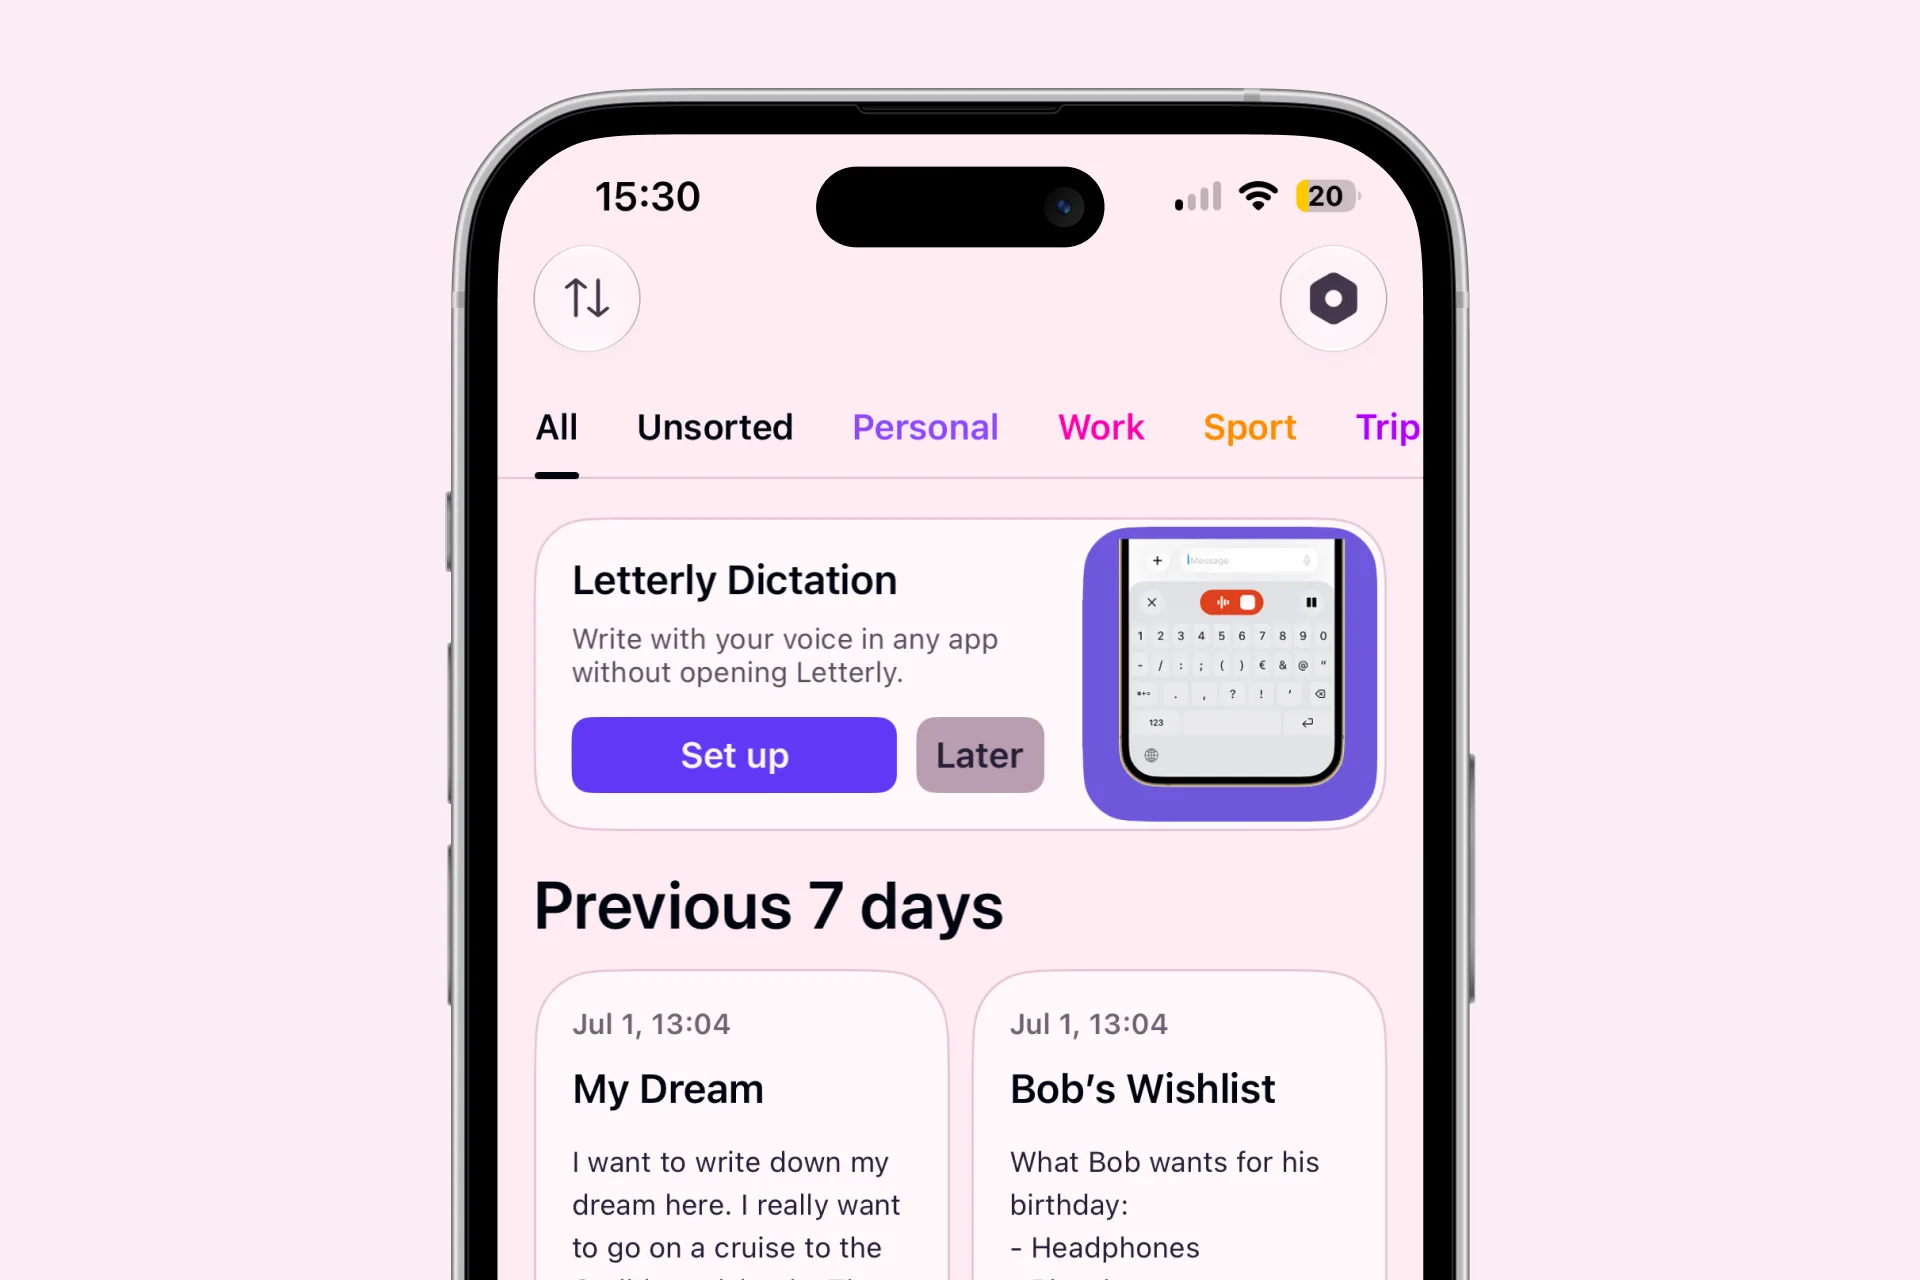
When you open the app, you’ll see a Letterly Dictation banner on the Home screen. Tap Set up to get started.
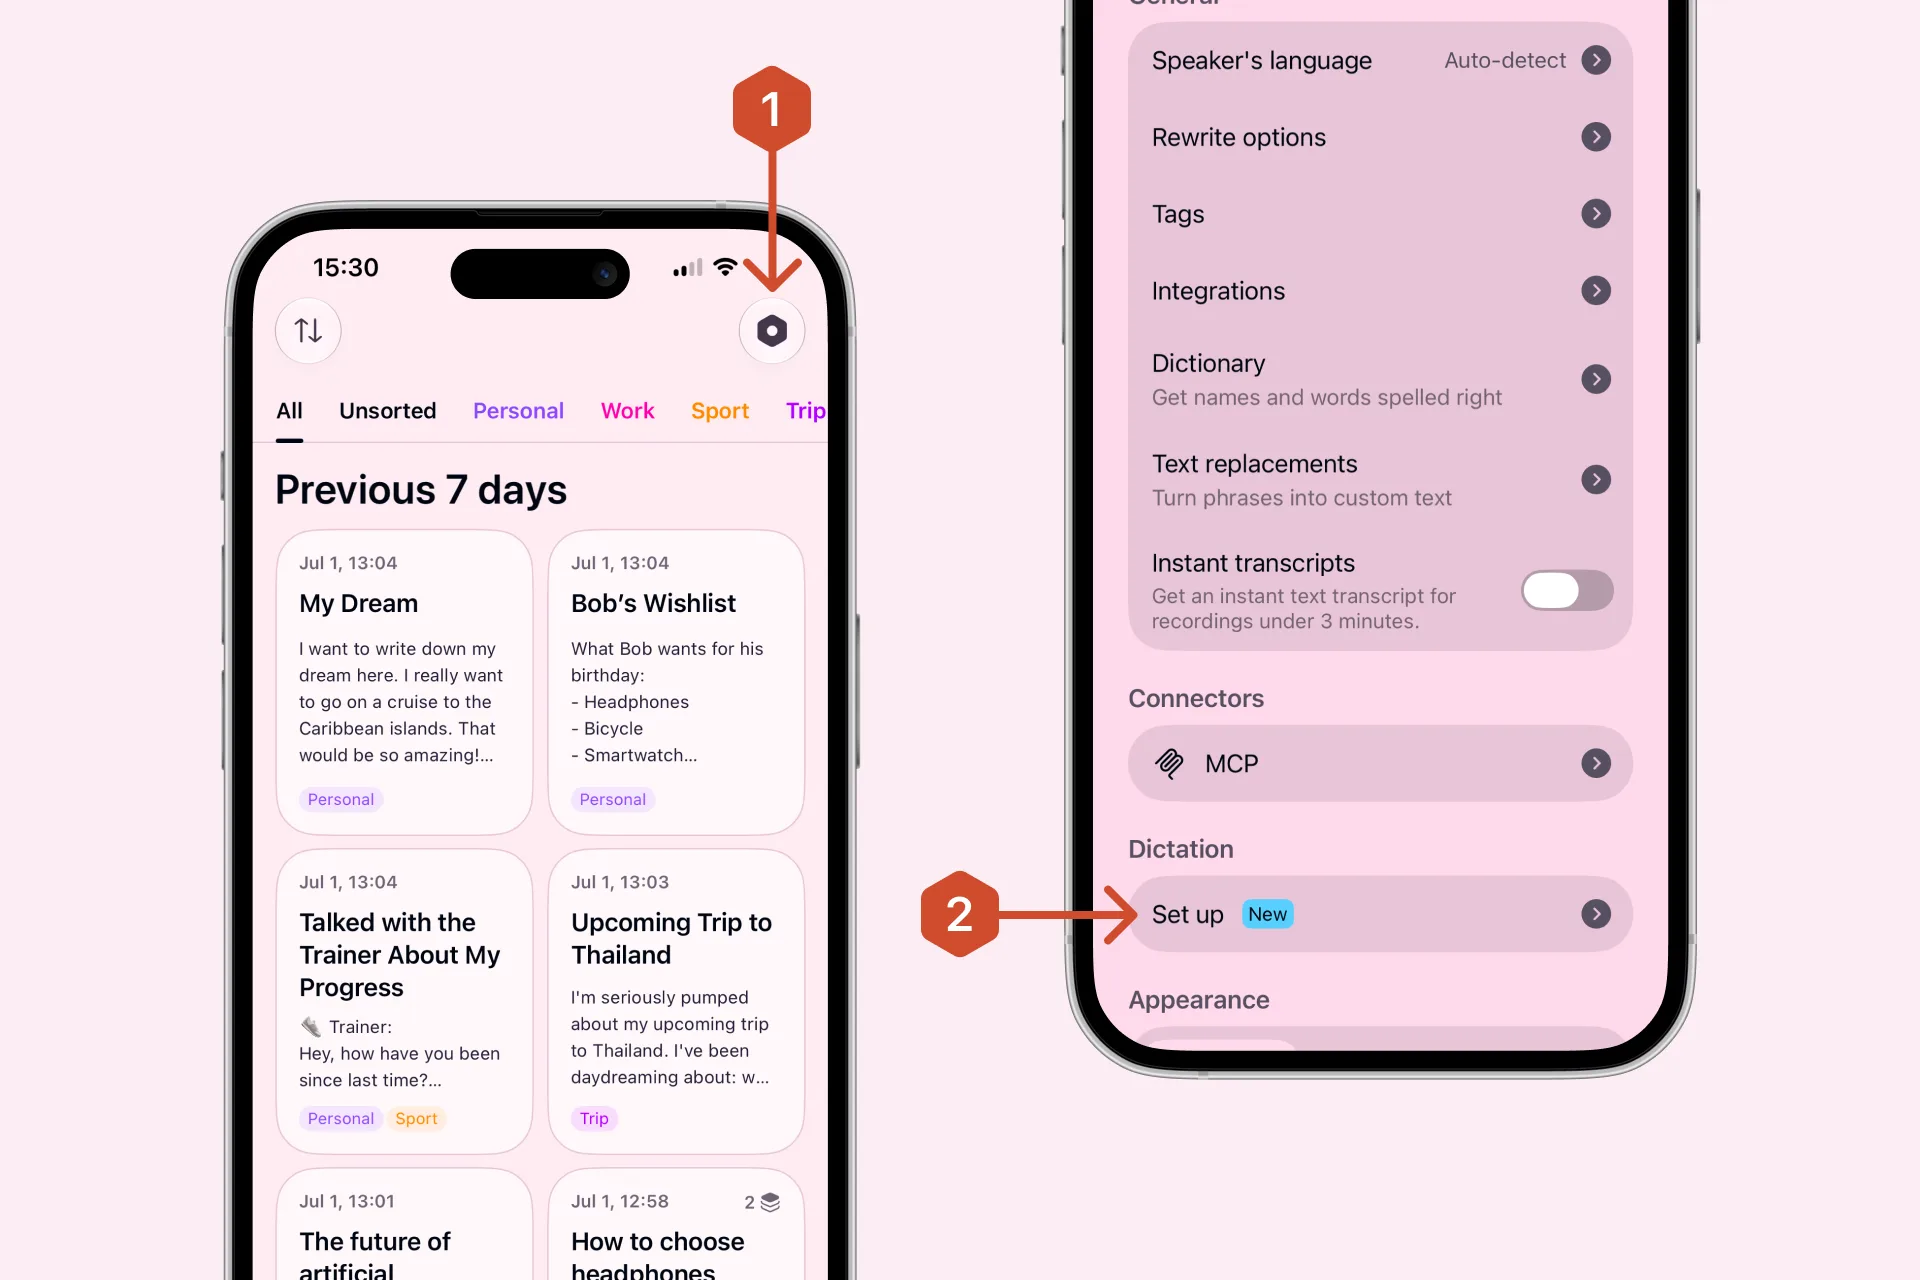
If you previously tapped Later, open Settings → Dictation, tap Set up, and complete the setup from there.
The setup steps are explained in detail below. 👇
1. Add Letterly Keyboard
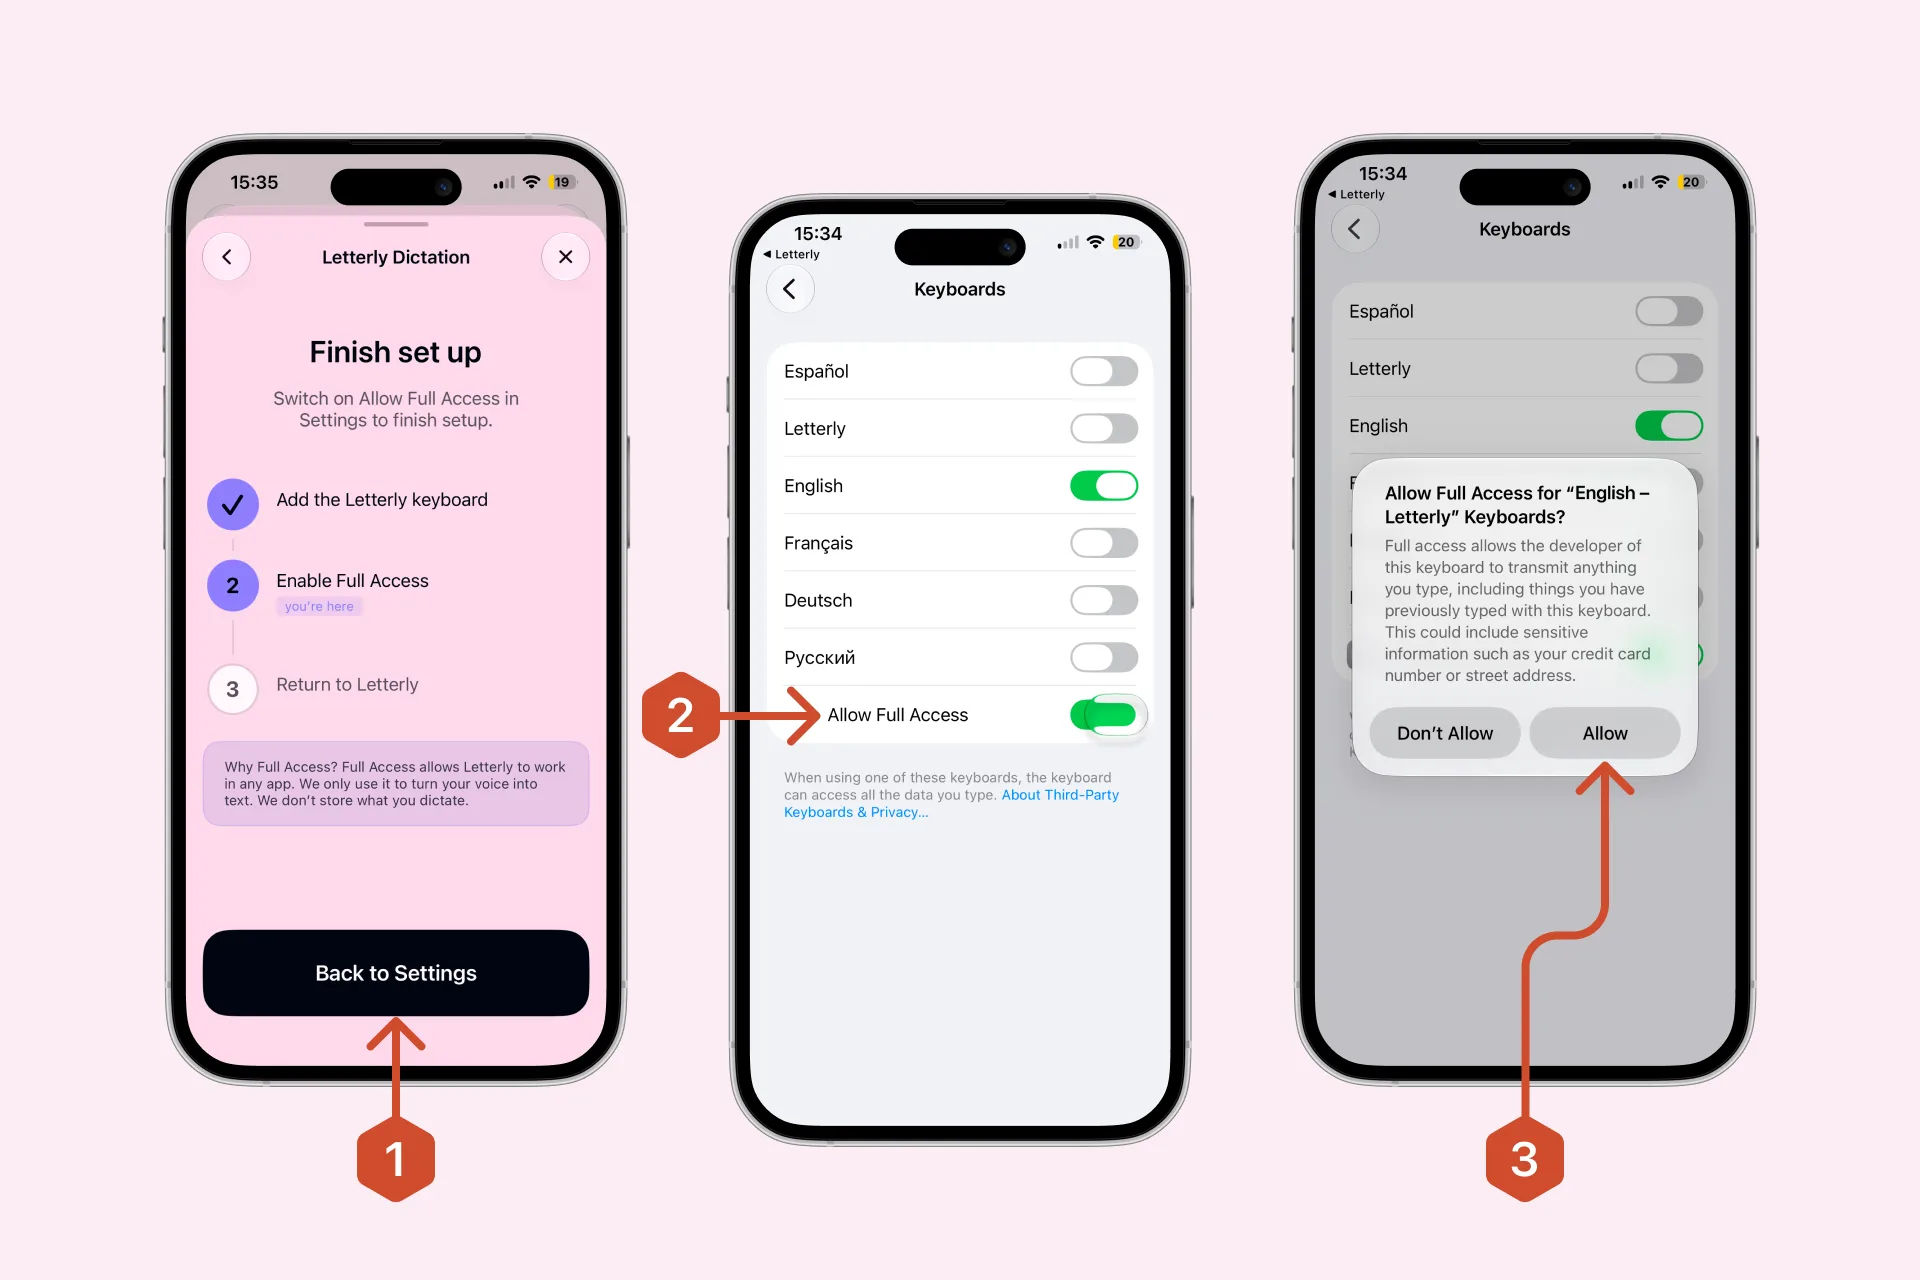
In Letterly, tap Open Settings. In your iPhone settings, tap Keyboards, then turn on Letterly.
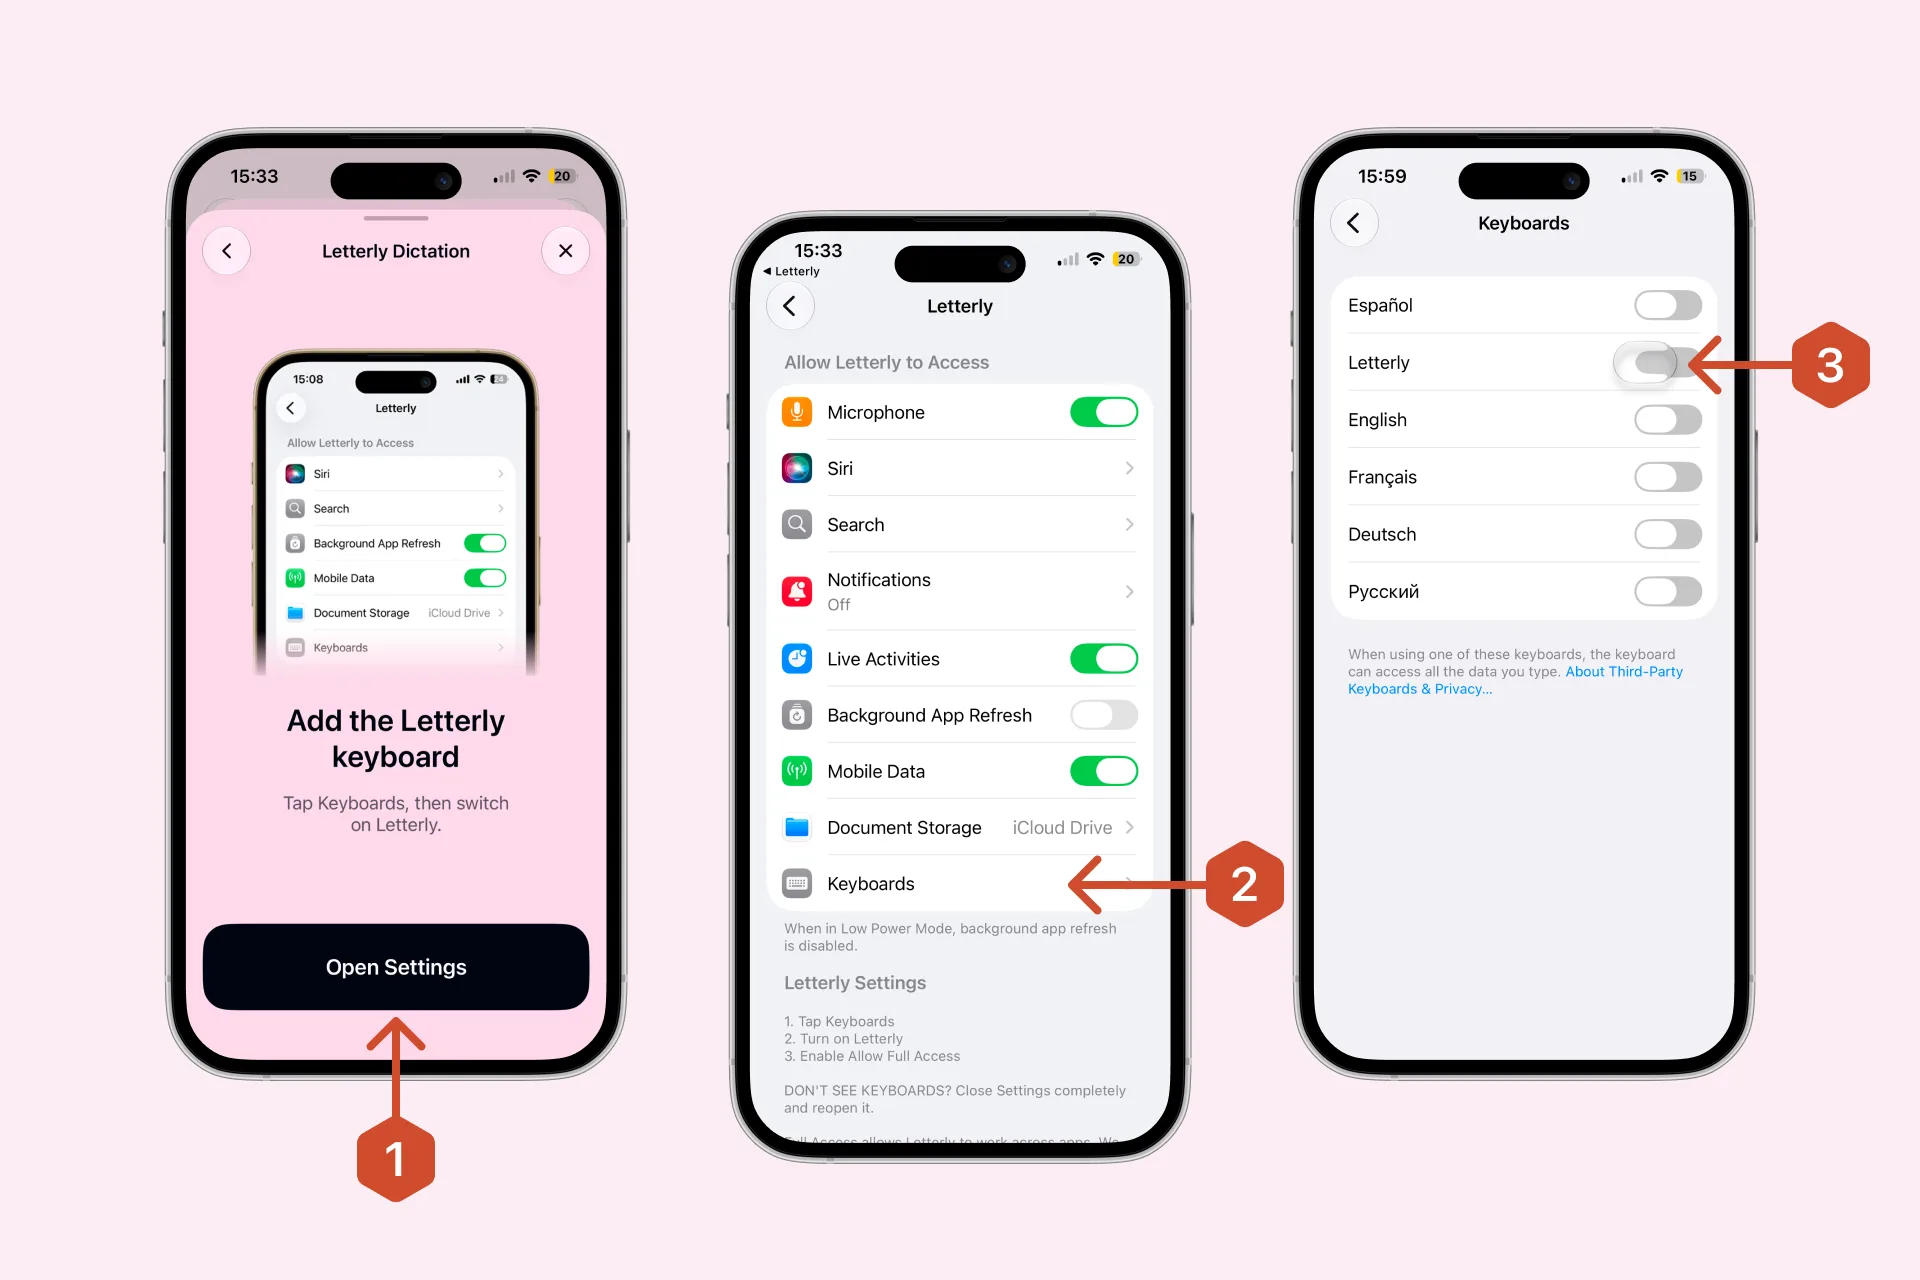
2. Enable Full Access
After you turn on the Letterly Keyboard, the Allow Full Access option will appear below it on the same screen. Turn it on.
3. Return to Letterly
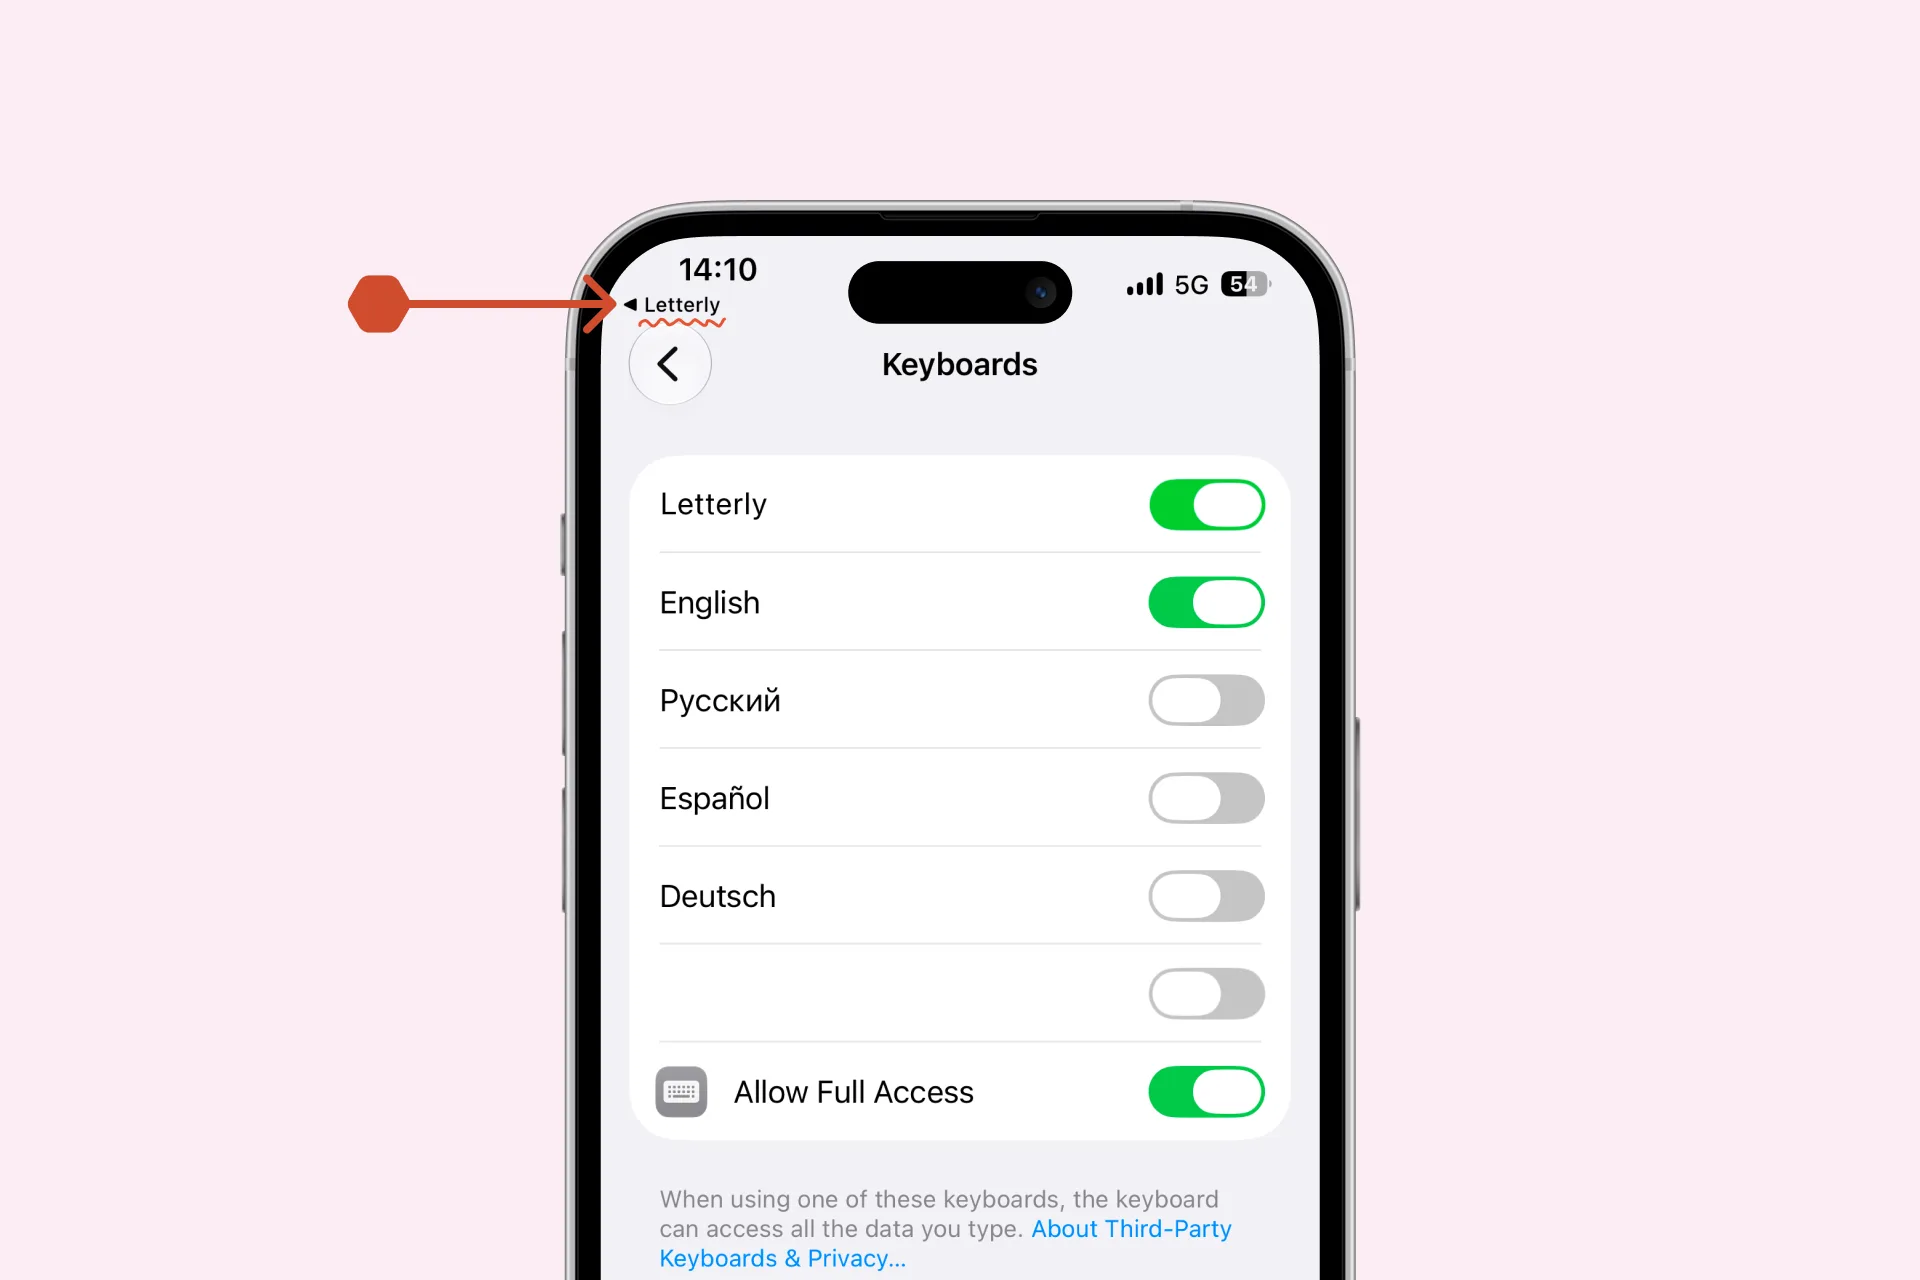
After you turn on Allow Full Access tap Letterly in the top-left corner to return to the app and complete the setup.
You can now dictate in Messages, Mail, Notes, WhatsApp, ChatGPT, and other apps.
That’s it for the basics.
Now let’s learn how to use Letterly Keyboard. 👇
II. Use the Letterly Dictation
Once the keyboard is set up, you can dictate and rewrite text in most apps on your iPhone.
1. Open the Letterly Keyboard
Tap any text field, then use the globe icon to switch to Letterly Keyboard.
2. Start dictating
Tap the microphone button to start recording. Recording begins immediately—there is no additional confirmation step.
While Letterly is recording, you’ll see these controls:
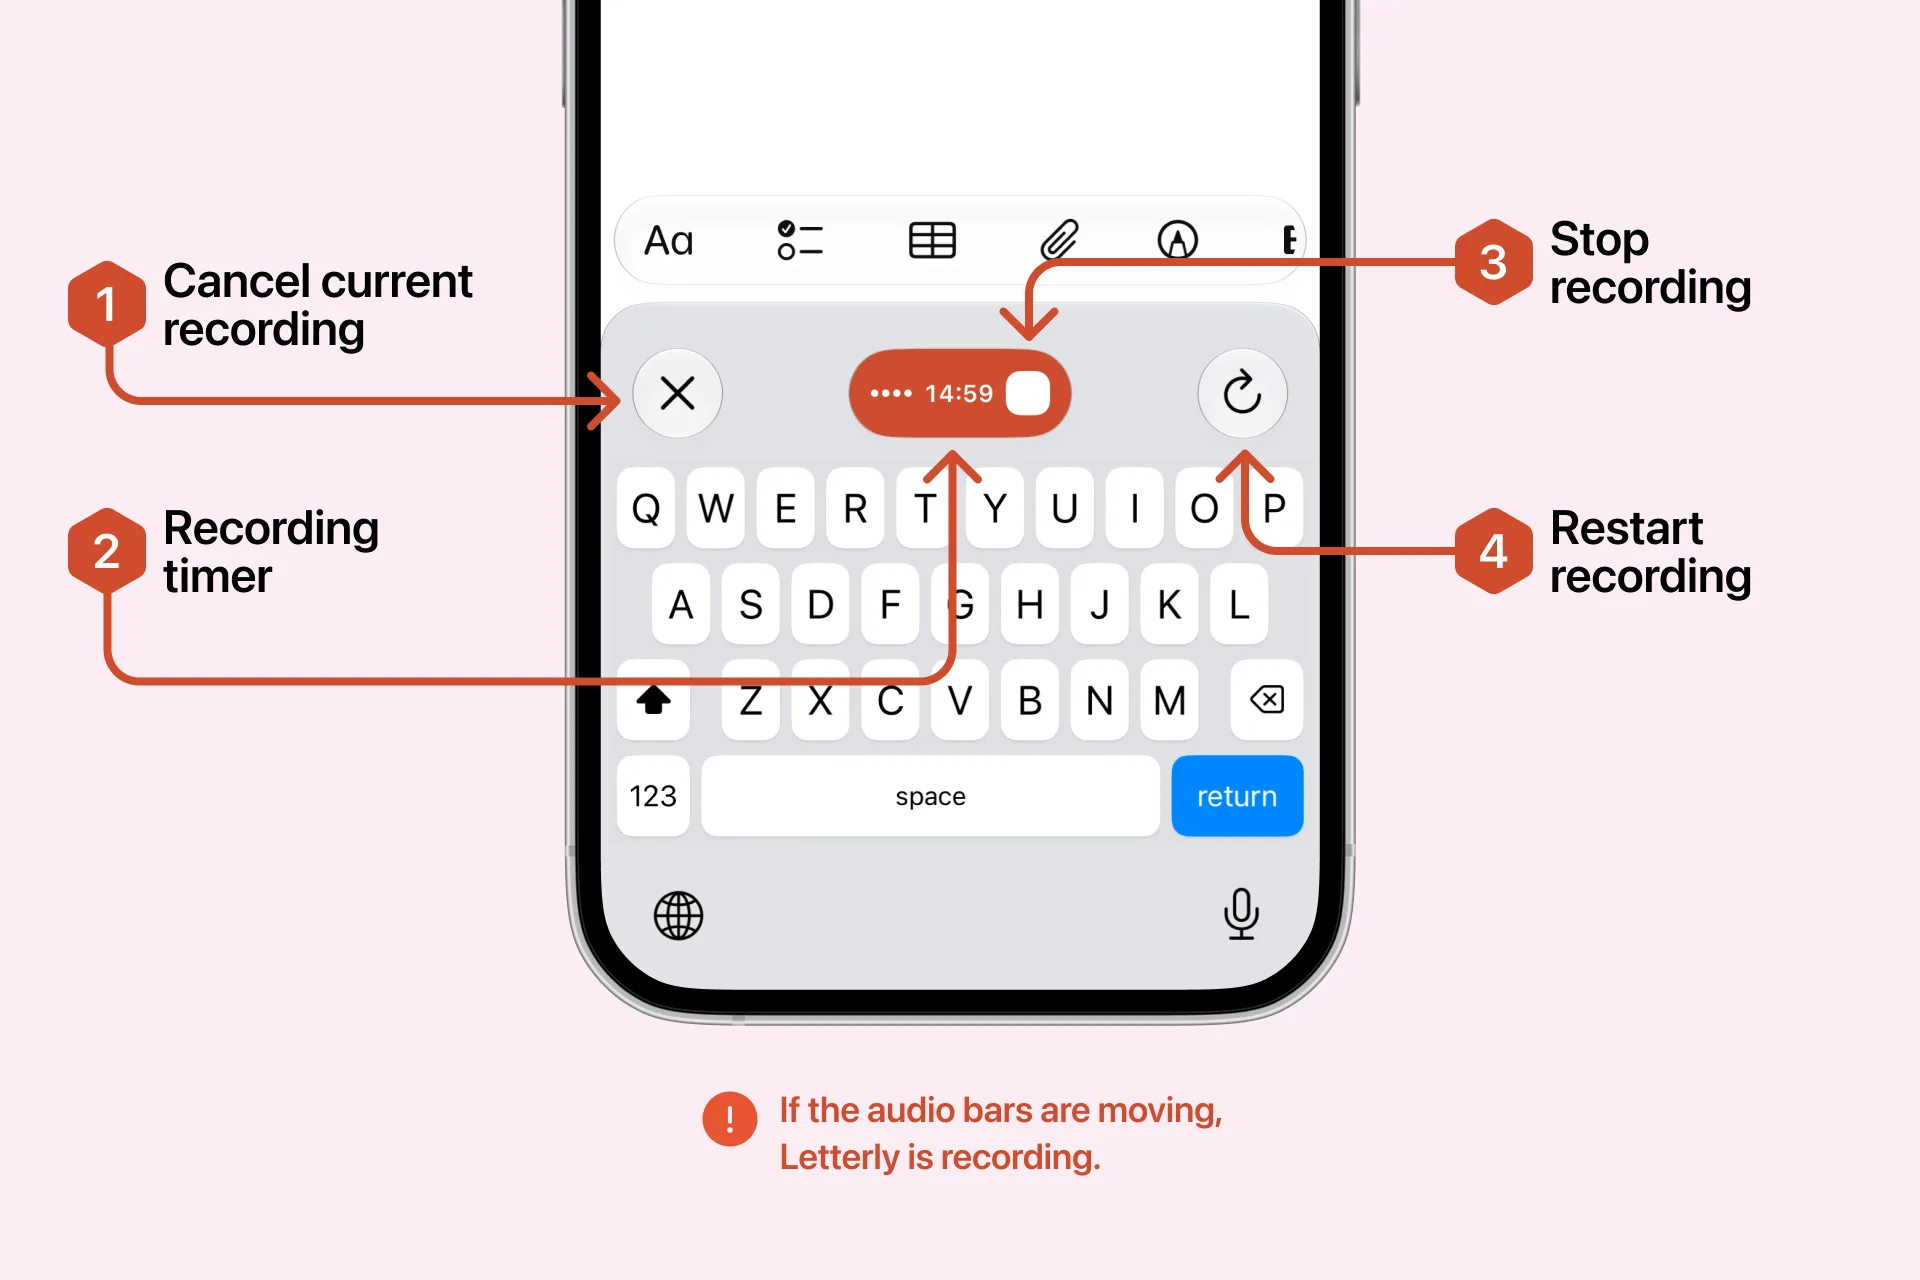
- Cancel current recording: tap X to cancel and discard the current recording.
- Recording timer: shows how long you’ve been dictating.
- Stop recording: tap the red button to finish the recording and process your text. After you tap Stop, Letterly processes your speech and inserts the finished text into the active text field.
- Restart recording: tap ↻ to discard the current recording and start again.
3. Rewrite the text
The rewrite button appears when:
- Letterly has just inserted your dictated text
- you select existing text
Tap the rewrite button to choose an option such as Magic, List, Structured, Journal Entry, and more.
In the rewrite options menu, you’ll see:
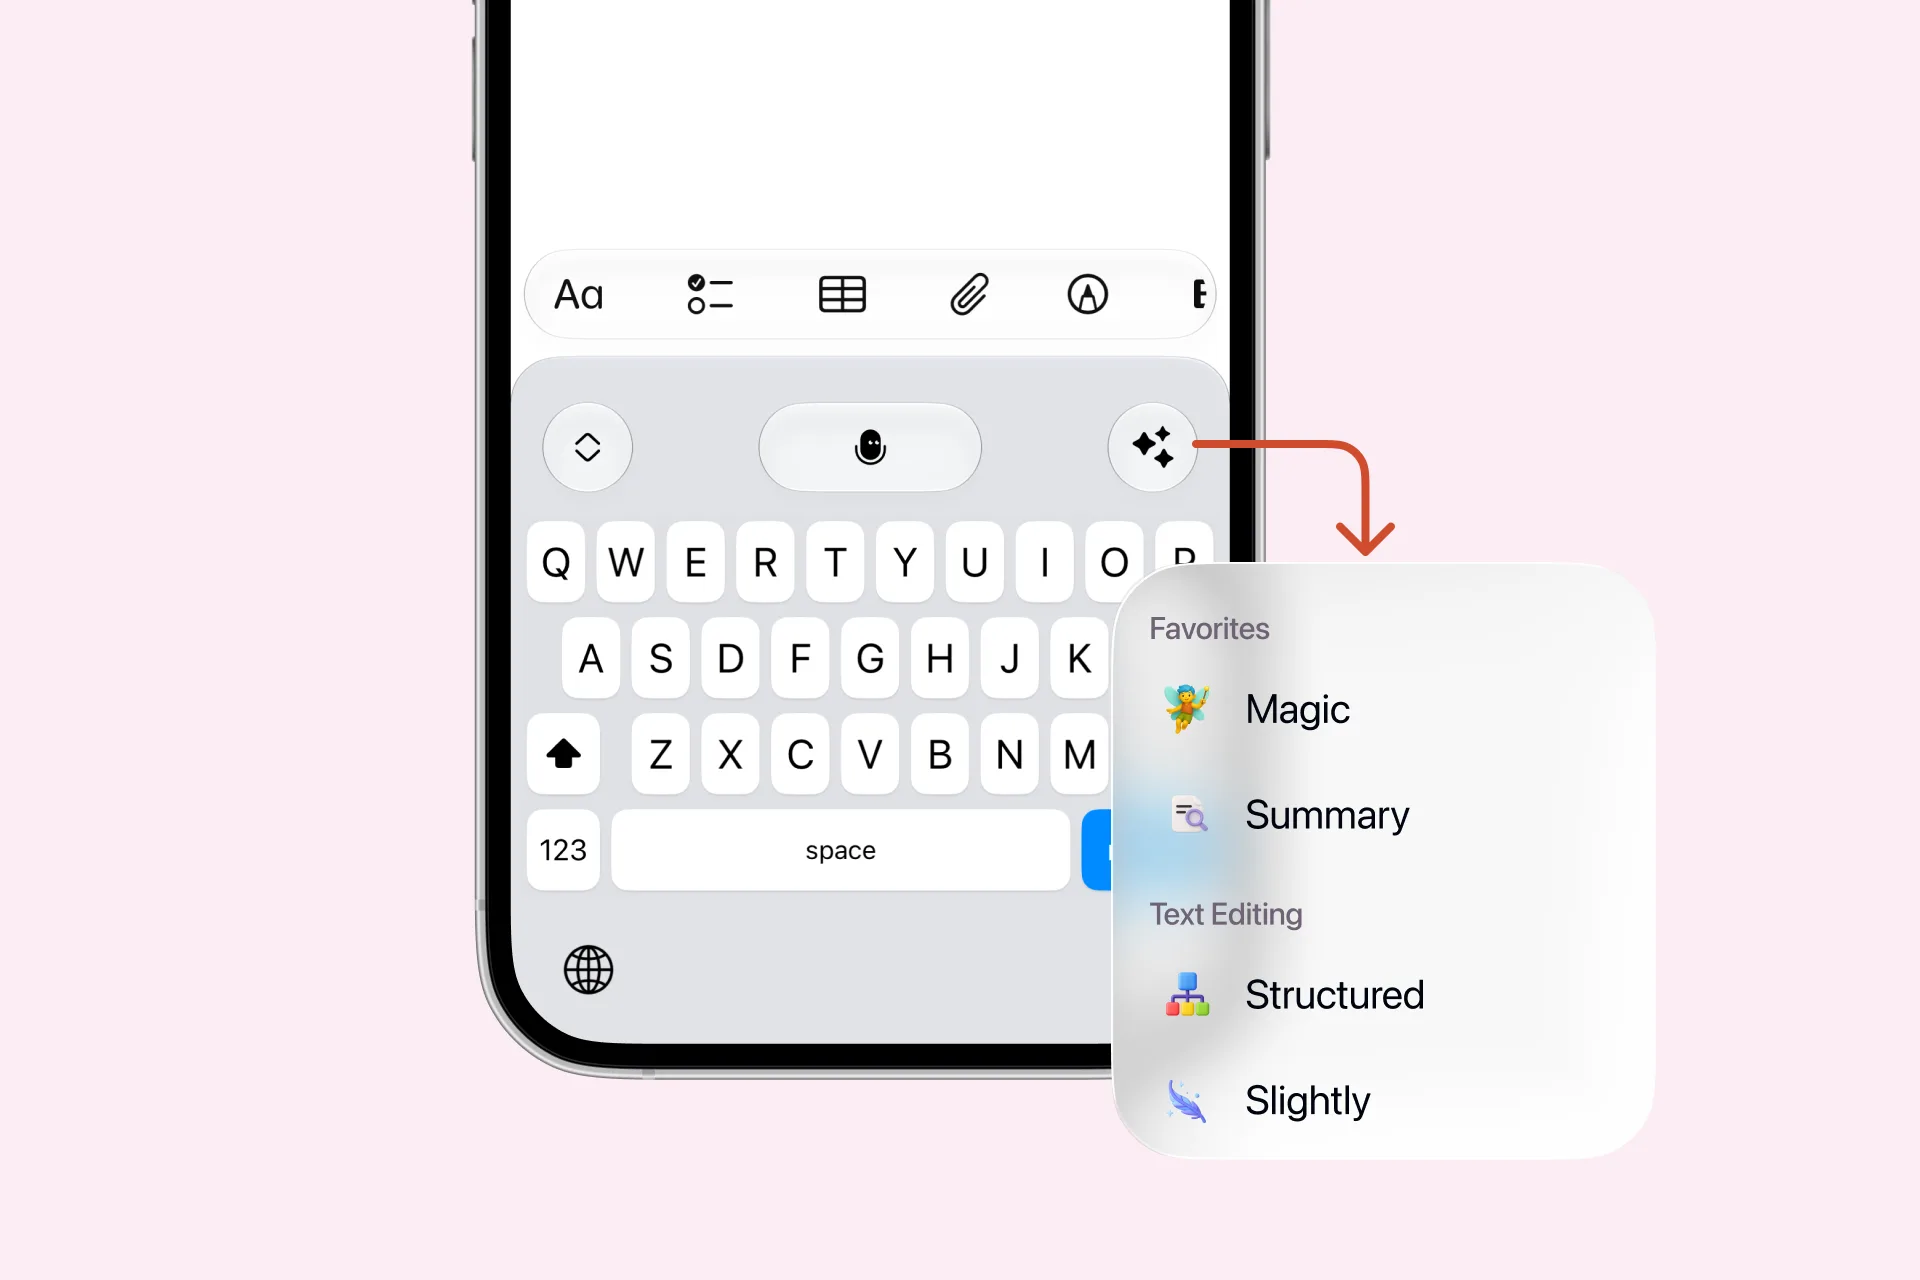
- Rewrite by voice: dictate how you want to change the text or correct mistakes.
- Custom prompts: rewrite options you’ve created.
- General options: ready-made rewrite options from Letterly.
Your favorite rewrite options appear at the top of the menu. You can choose which options appear there in the Letterly app.
4. Use the keyboard menu
Tap the menu button on the left to access additional actions:
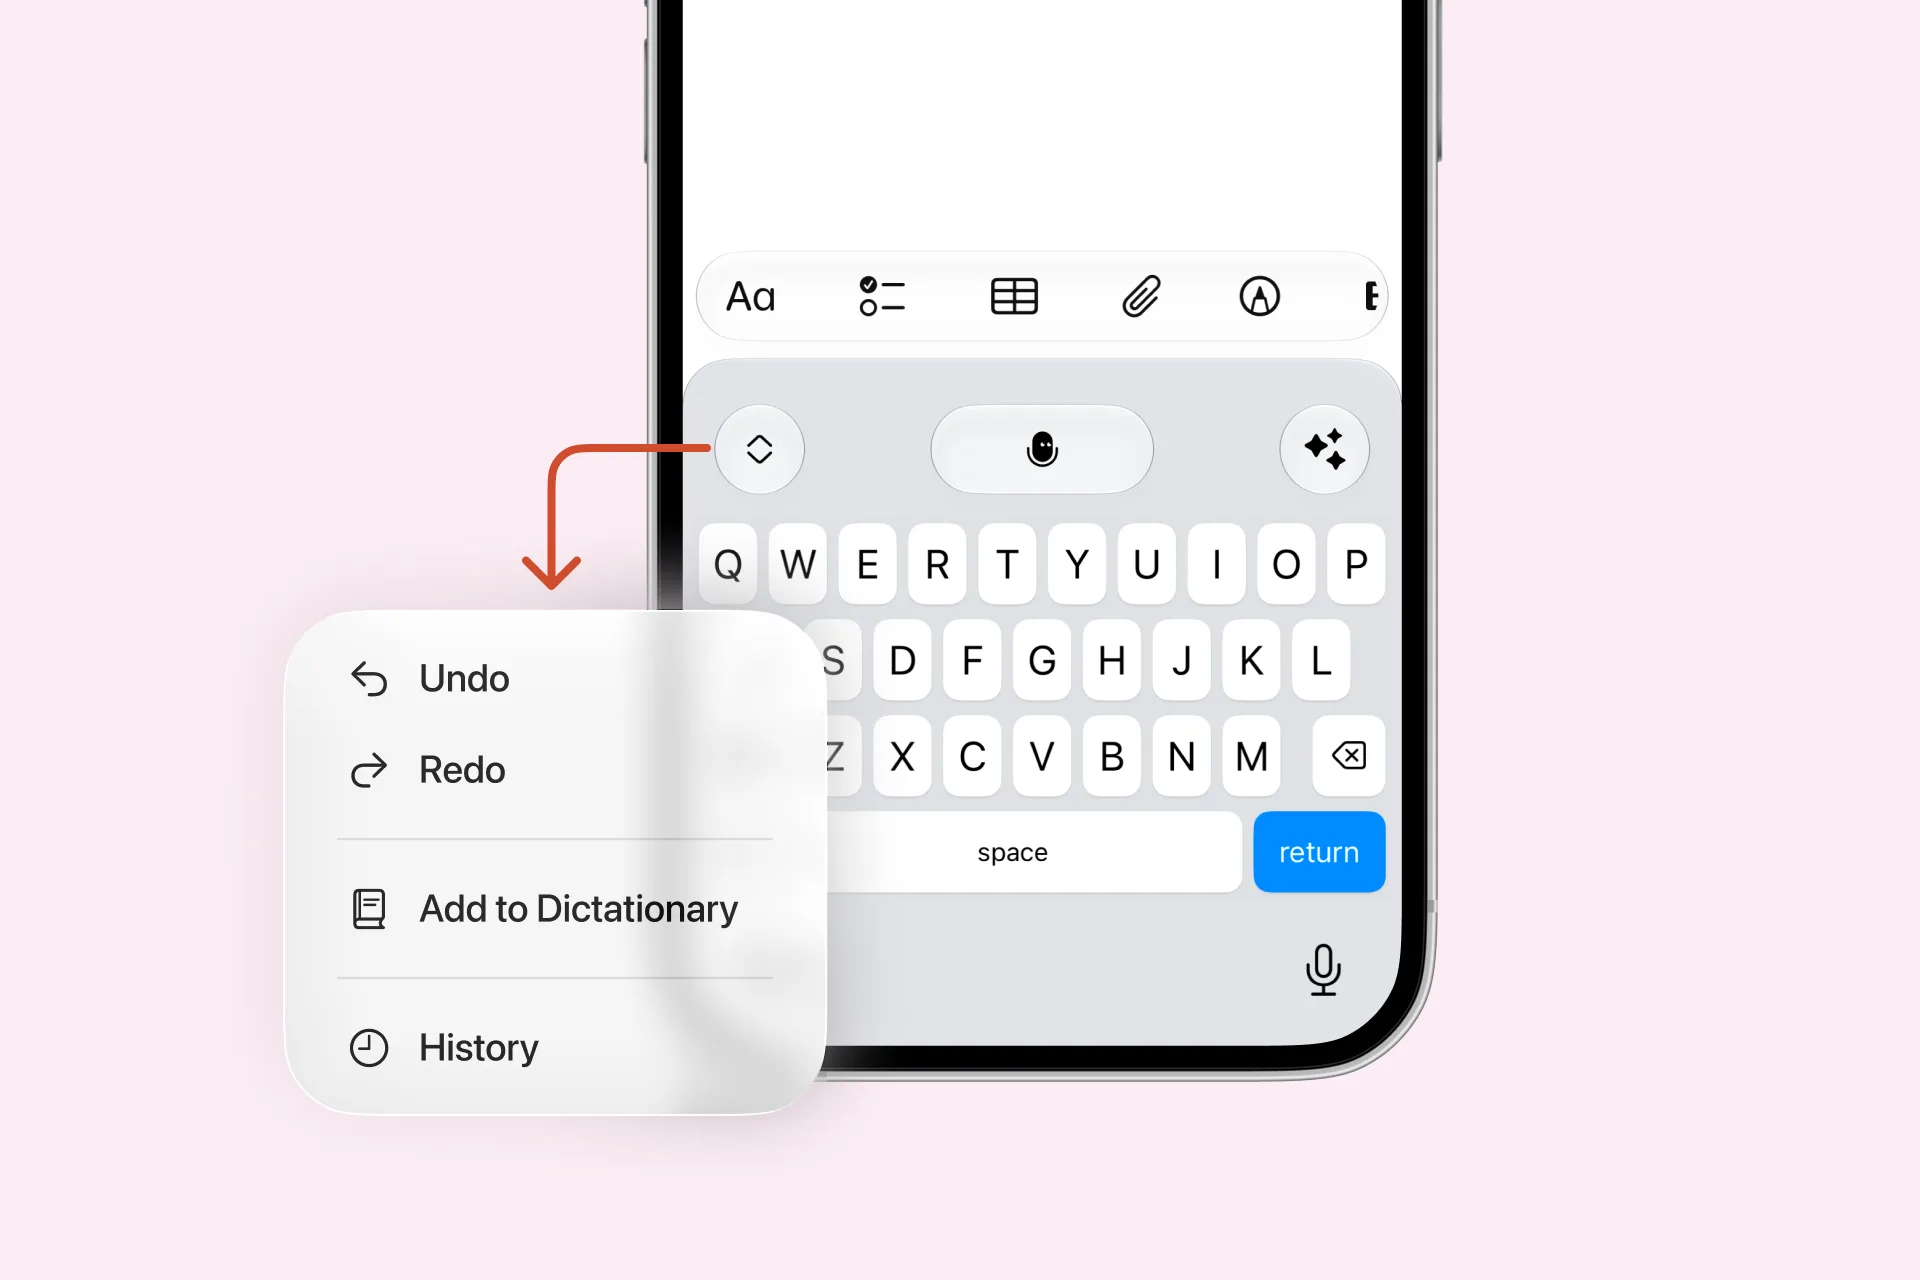
- Undo: removes the text Letterly just inserted.
- Redo: restores the text removed with Undo.
- Add to Dictionary: adds a word to your Letterly Dictionary so Letterly spells it correctly in future dictations.
- History: opens your Dictation history in Letterly.
5. Turn off Dictation at any time
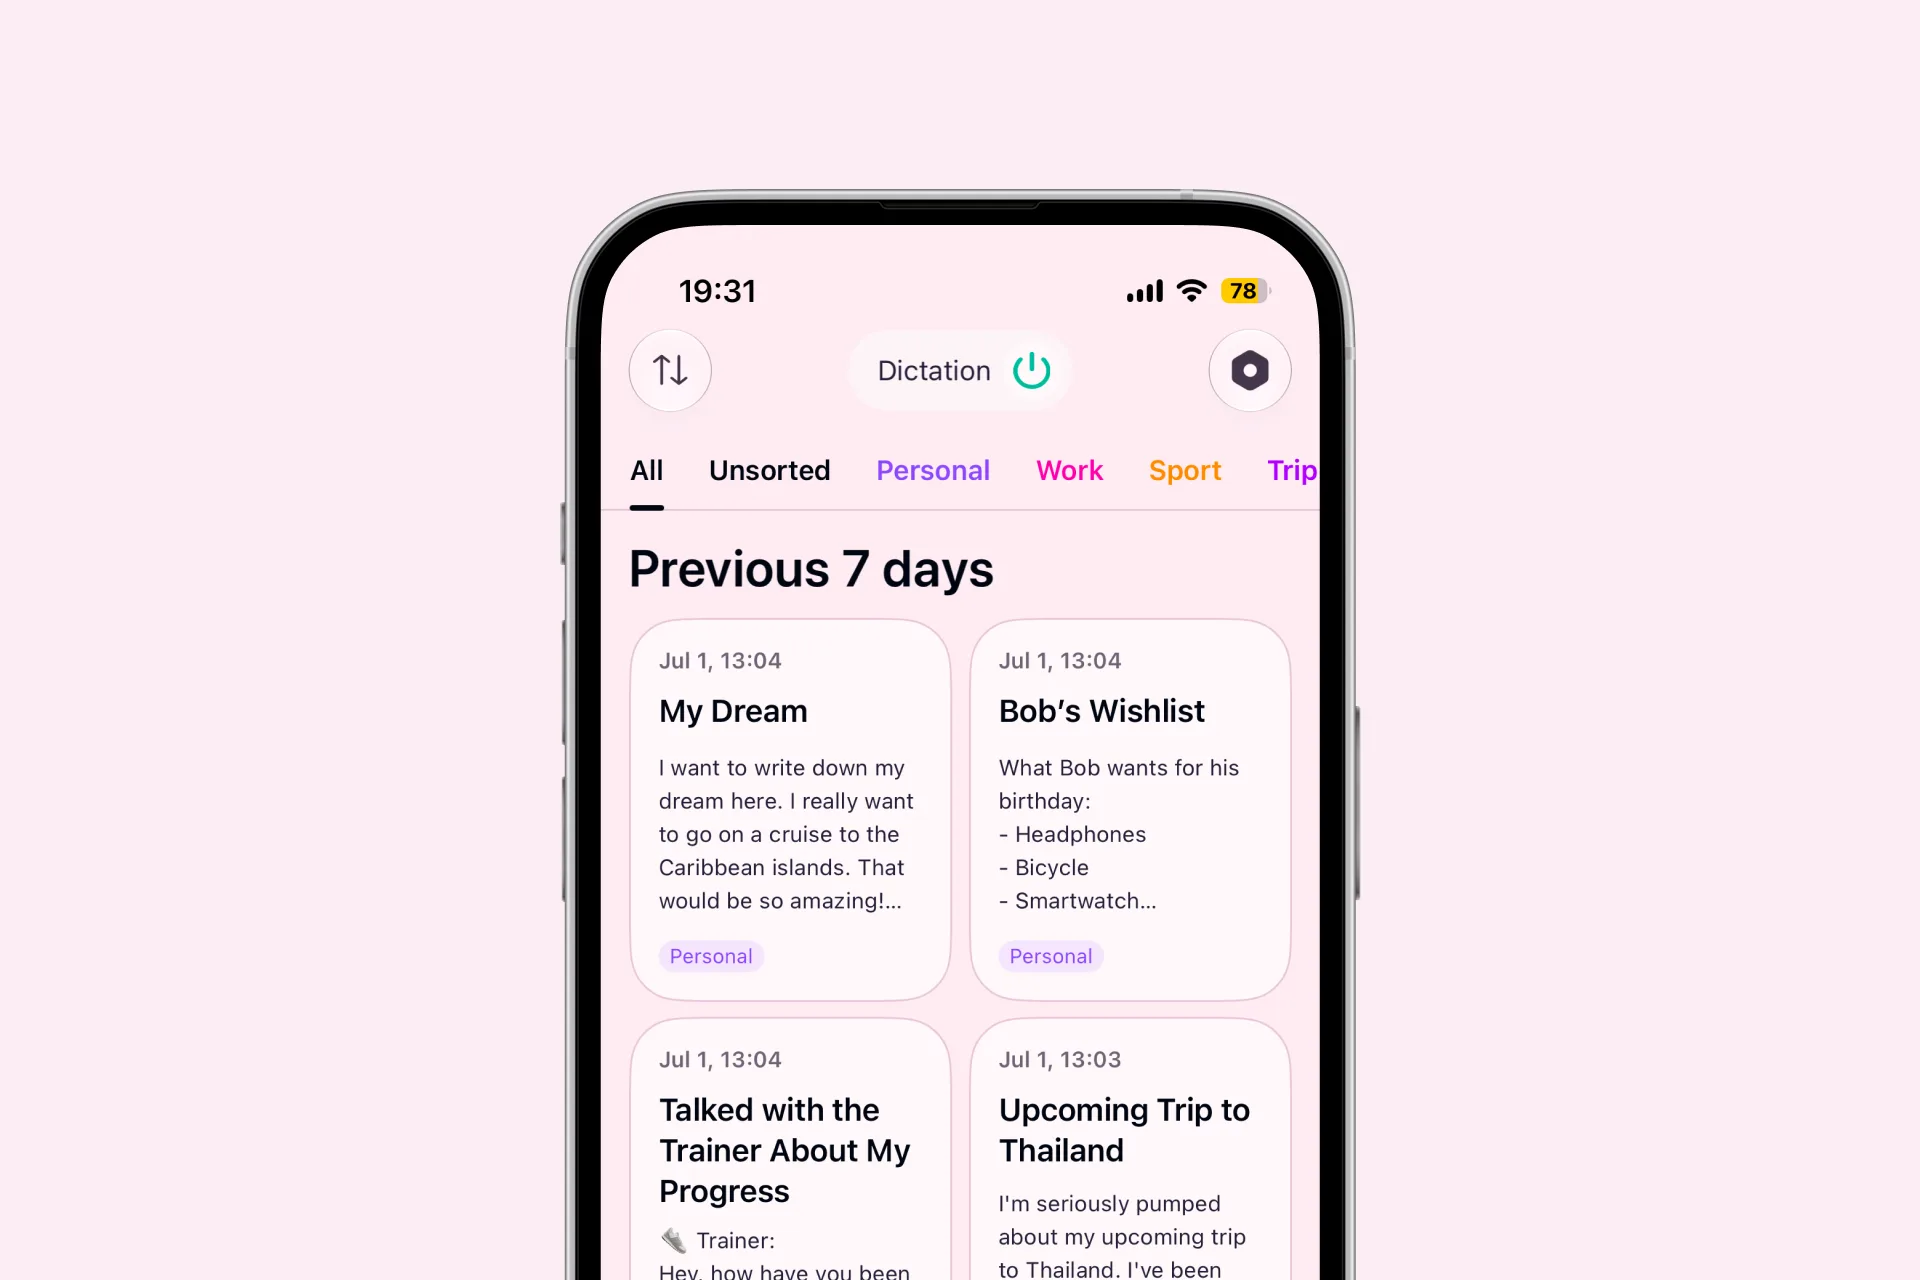
If you no longer need Letterly Dictation, open the Letterly Home screen. Tap the power icon next to Dictation at the top of the screen to turn it off and disable keyboard access.
You can also turn off Dictation from the Lock Screen: tap the power icon in the Letterly widget without unlocking your iPhone.
III. Work with Dictation History
1. Open History
Letterly saves your completed dictations in History, so you can return to them later.
You can open History in two ways:
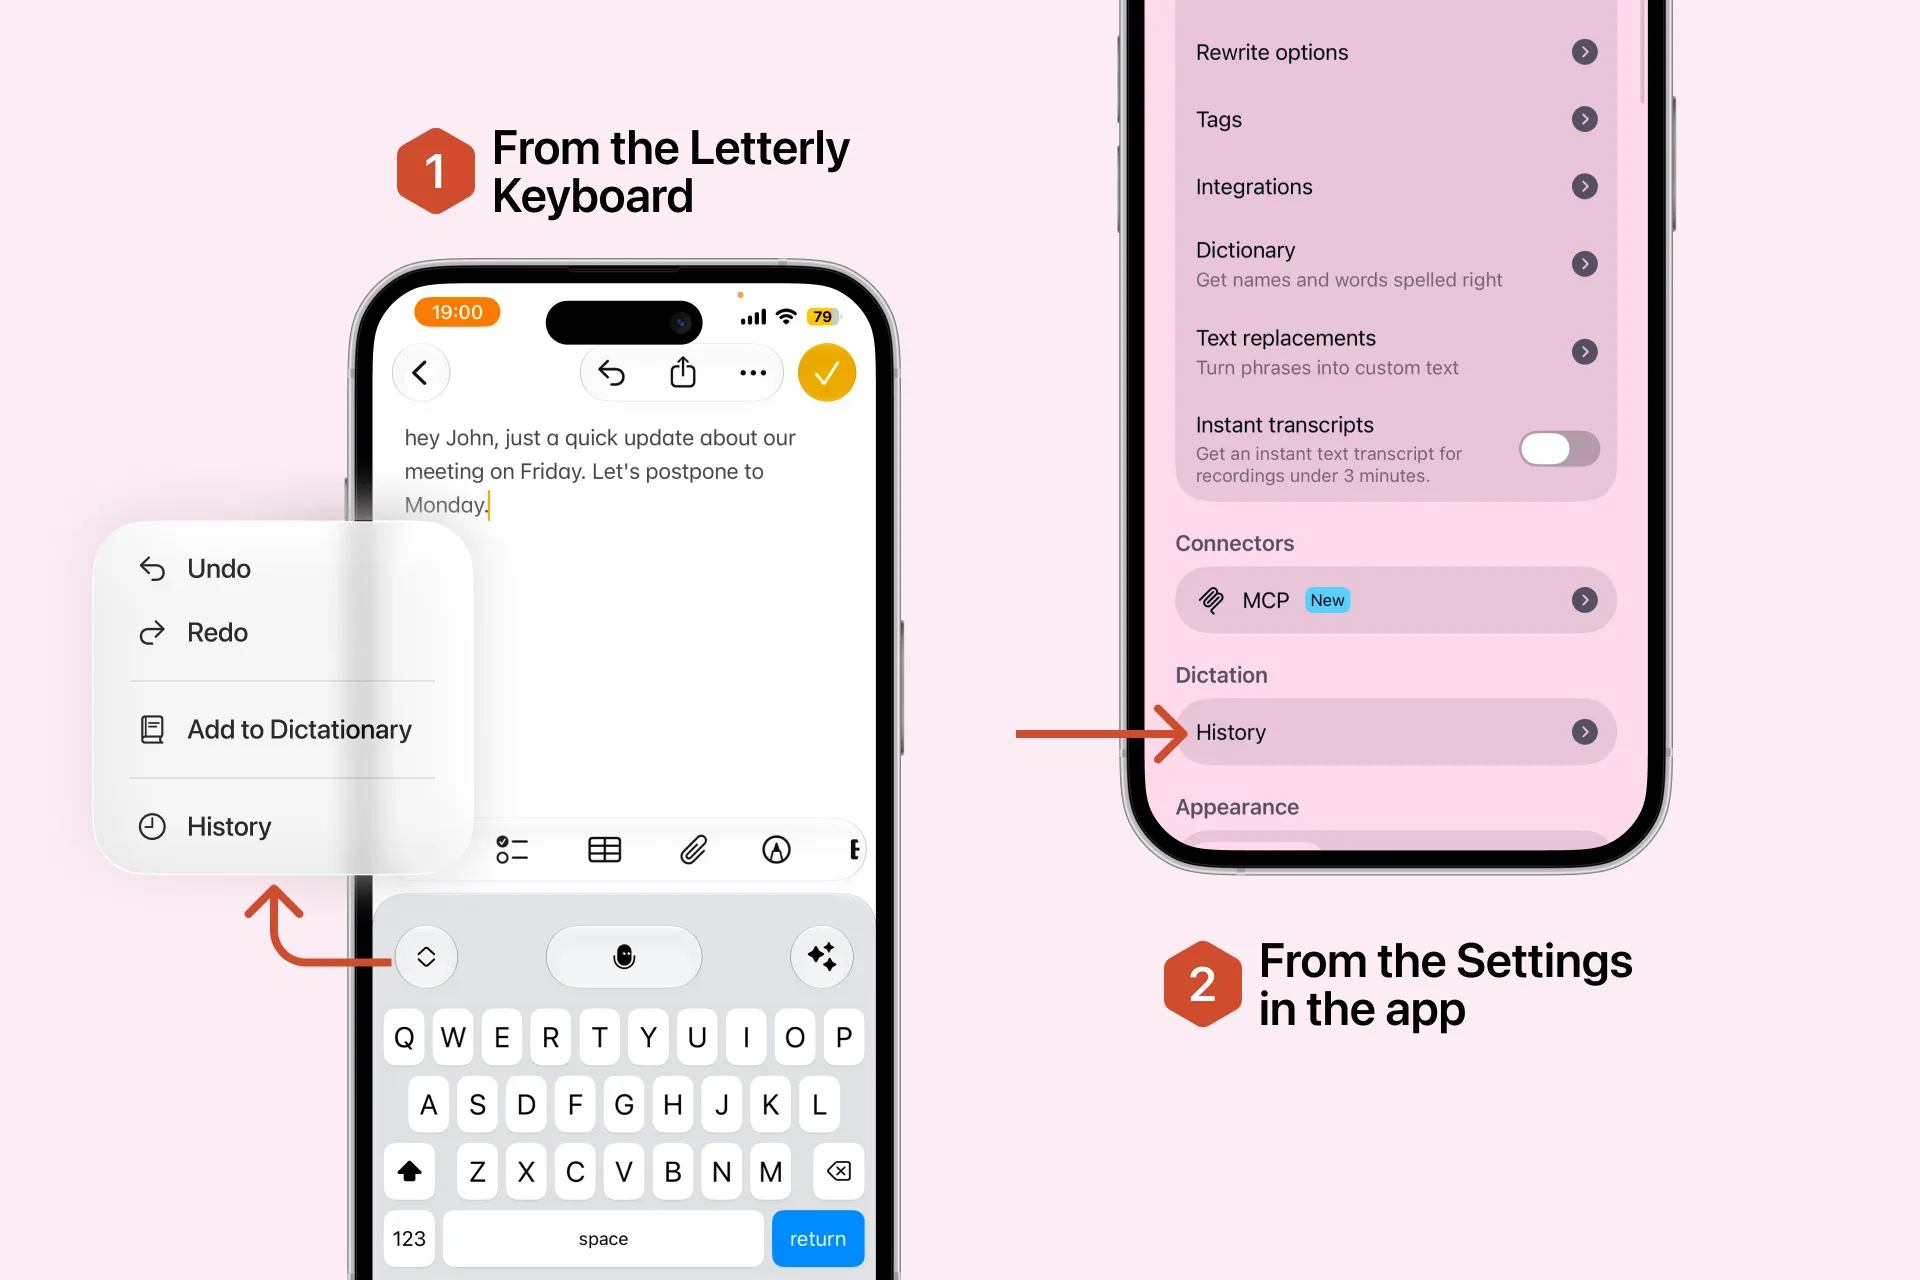
- From the Letterly Keyboard, open the menu and tap History.
- In the Letterly app, open Settings and tap History.
Your dictations are grouped by date, just like notes in the Letterly app.
2. History Actions
Press and hold a dictation or swipe left on it to open the available actions:
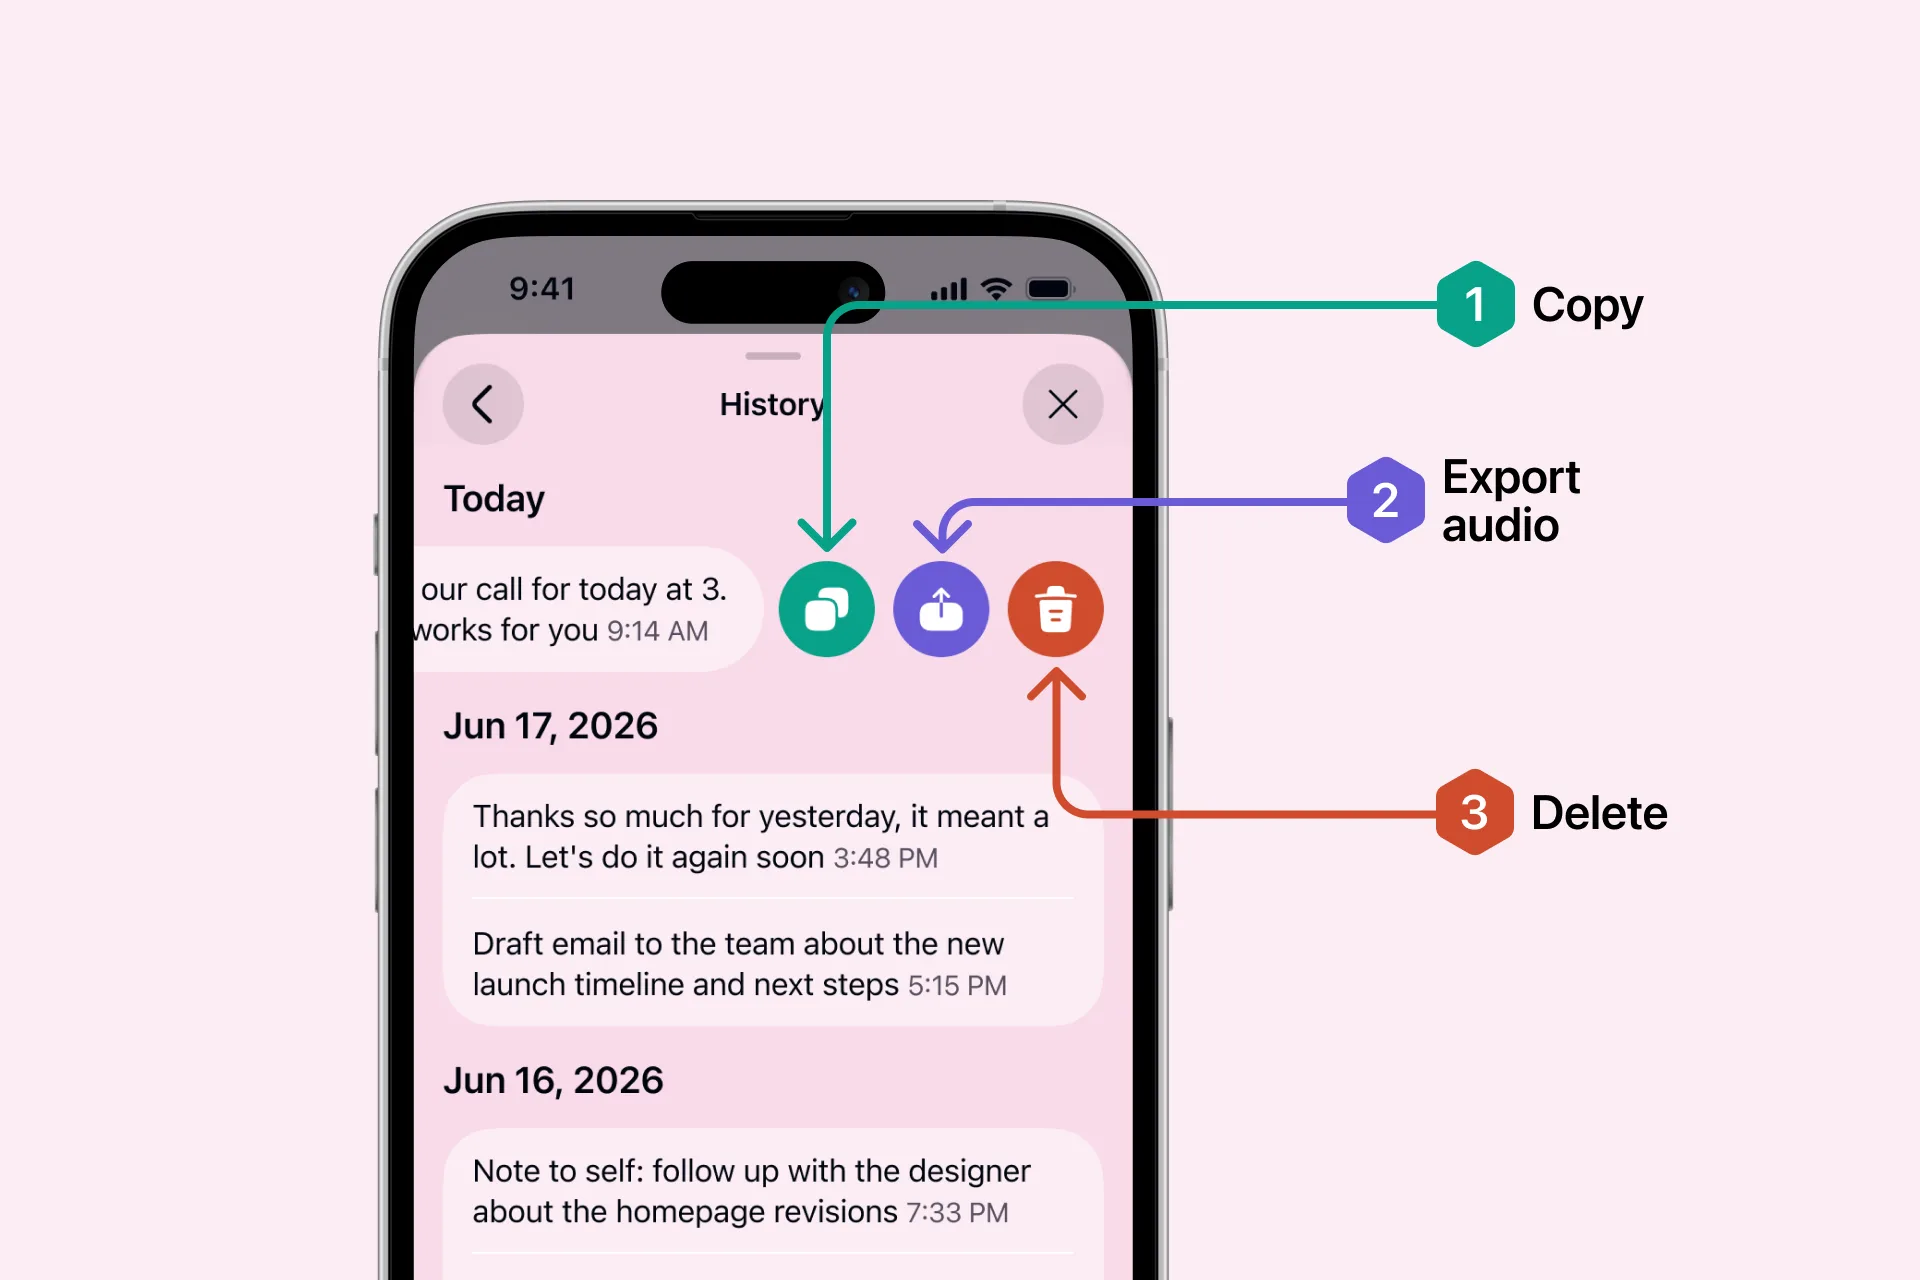
- Copy: copies the dictation text to your clipboard.
- Export audio: saves or shares the original recording as an audio file.
- Delete: permanently removes the dictation from History.
You did it! 🎉
We hope you enjoy using Letterly Keyboard and that it makes writing on your iPhone feel faster, easier, and more natural.
Got questions? Email us at hi@letterly.app – we’re happy to help.