How to Record Internal Audio on Mac: 3 Easy Ways

You hit record in QuickTime, play the video or join the call, stop the recording — and hear… silence. Or just your own voice.
That’s not a bug. By default, a Mac records sound from the microphone, not the sound coming out of your speakers. To record internal audio — a Zoom call, a webinar, a YouTube video — you need one extra step. Here are three ways to do it.
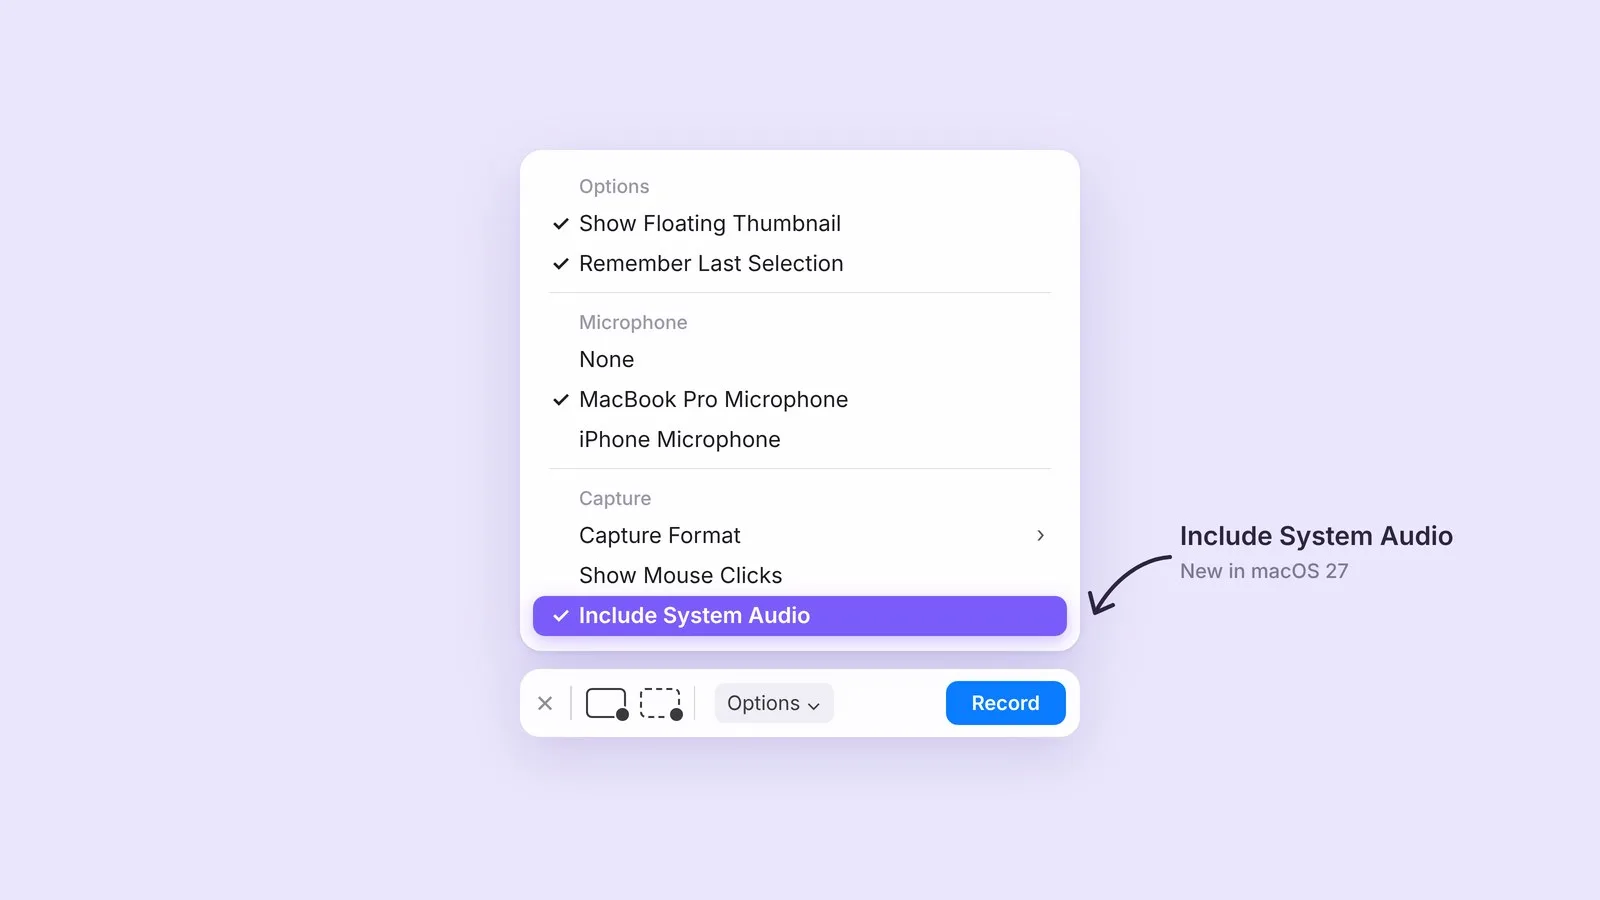
1. Use the Screenshot toolbar (macOS 27)
Starting with macOS 27, the built-in screen recorder can capture system audio — no extra apps needed.
- Press Shift + Command + 5.
- Choose Record Entire Screen or Record Selected Portion.
- Click Options and, under Capture, select Include System Audio. Under Microphone, pick your mic if you want your voice in the recording too.
- Click Record. To stop, click the Stop button in the menu bar.
2. Use the recording button in your call app
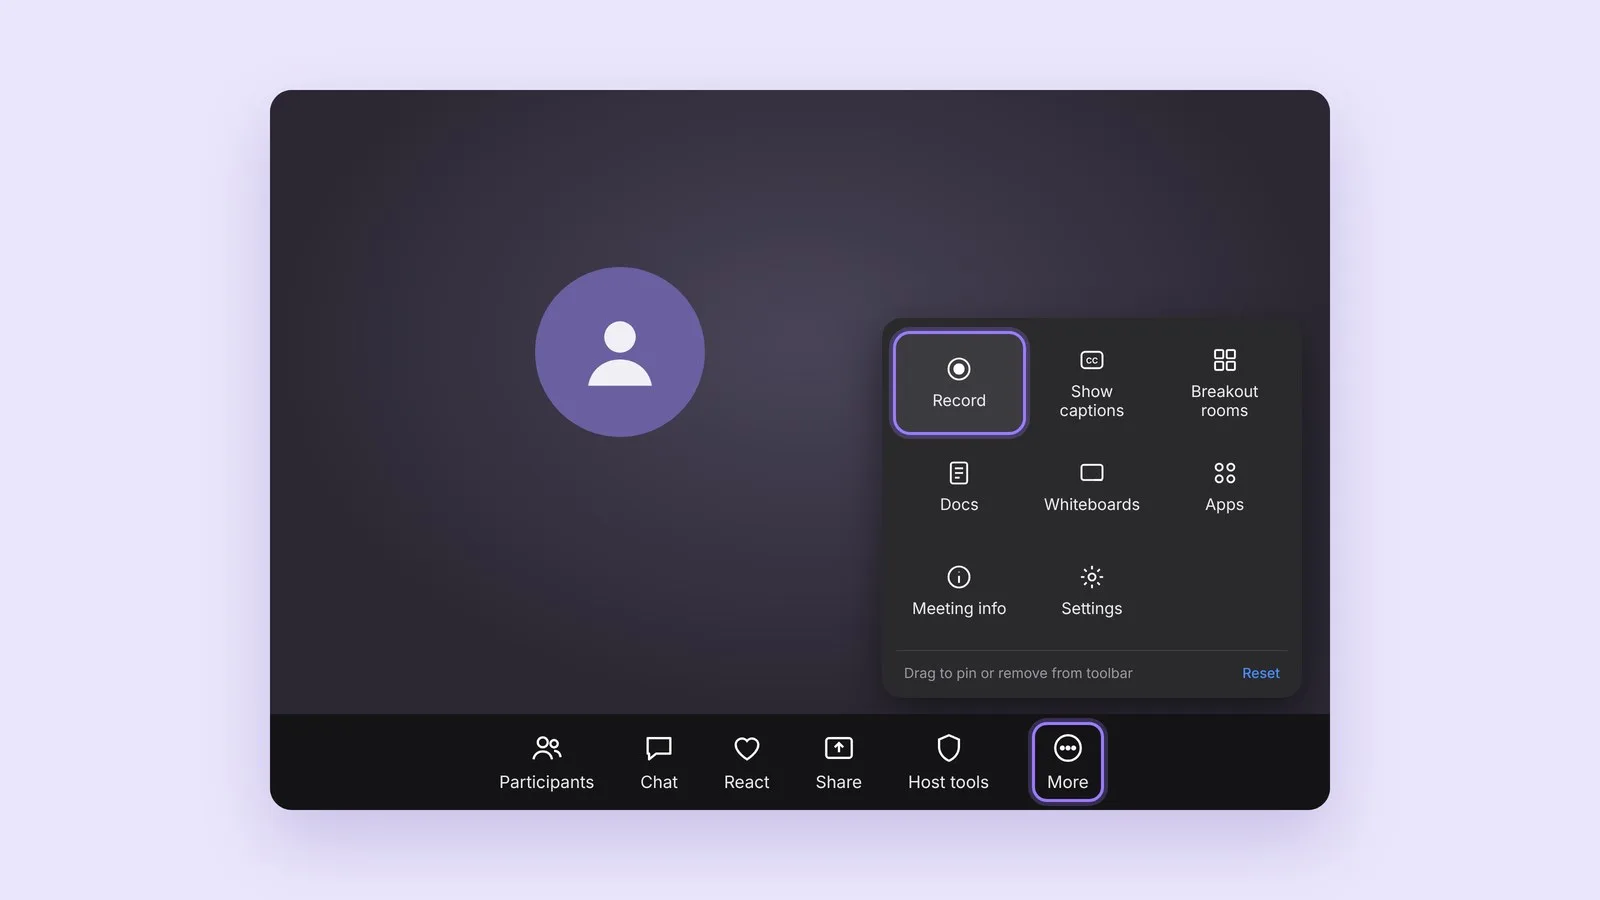
If you want to record a call, the easiest option is often already there. Zoom, Google Meet and Microsoft Teams all have a built-in Record button that saves both video and sound. But it isn’t available to everyone:
- Zoom — free accounts can record to your computer, but only if you’re the host or the host allows you to. Cloud recording needs a paid plan.
- Google Meet — recording works only on some paid Google Workspace plans or with Google One 2 TB and up. A free Gmail account can’t record.
- Microsoft Teams — with a personal account, you need Microsoft 365 Personal, Family or Premium. With a work account, it depends on your company’s settings.
Also keep in mind that everyone on the call sees that you’re recording.
3. Record what was said with Letterly on your phone
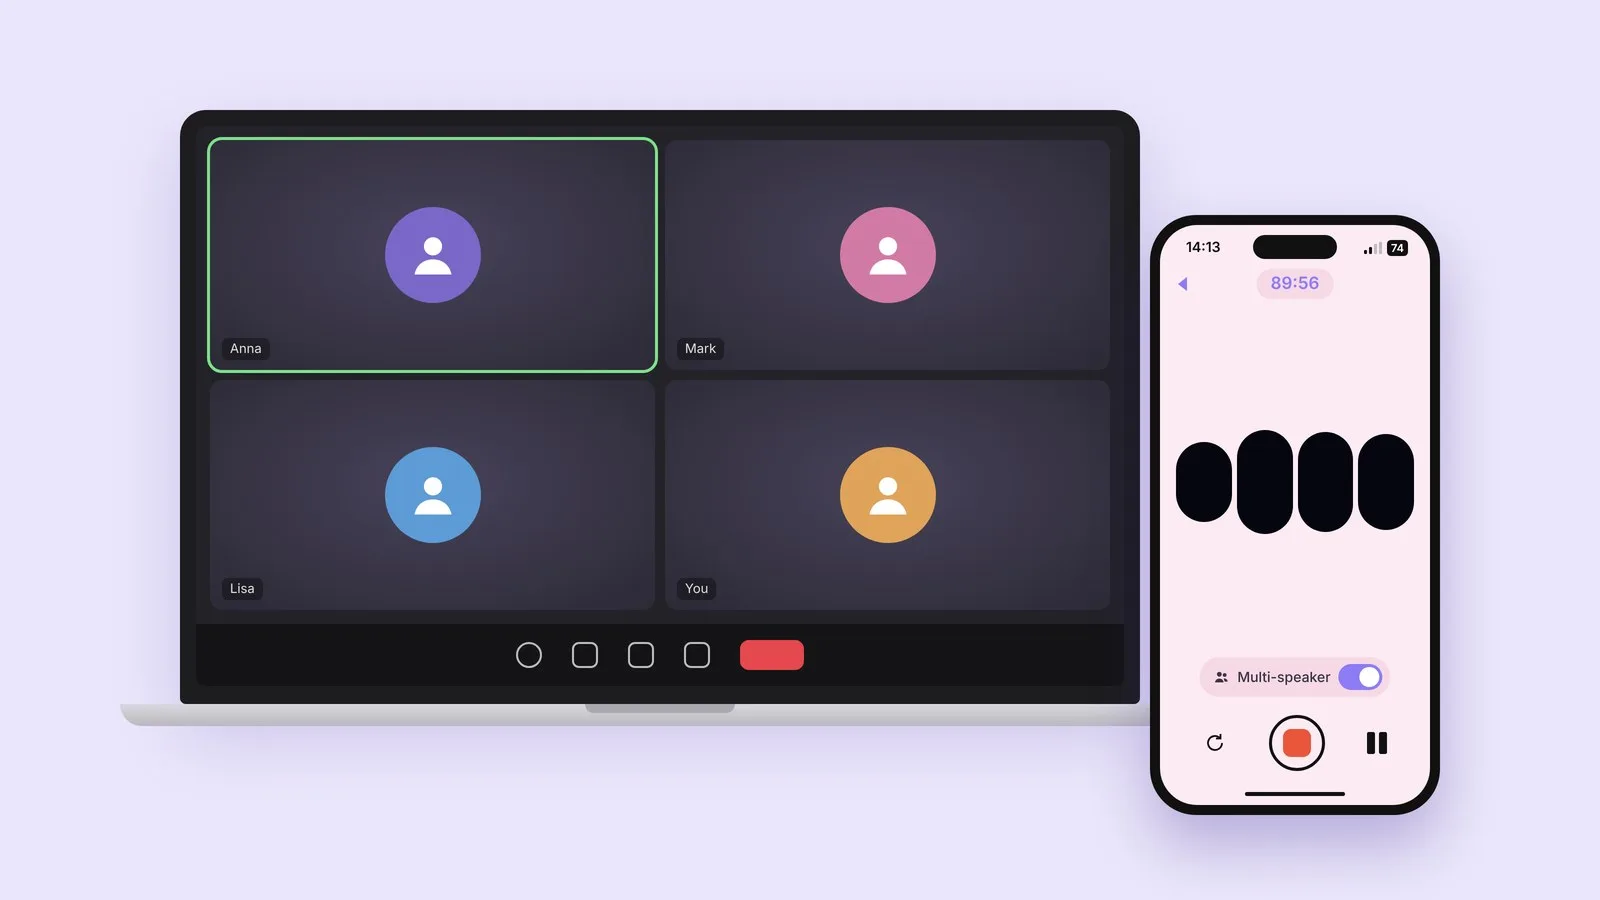
If what you really need is what was said — not a video file — you don’t have to set anything up on your Mac. Just record the call with Letterly on your phone and get a ready transcript.
- Turn off your headphones so the call plays through your Mac’s speakers.
- Open Letterly on your phone and put it next to your Mac.
- Tap the record button and join your call as usual. Tap Stop when it’s over.
In a few seconds you get a full transcript, plus the original audio you can play back or download. Need a short recap? Tap Rewrite and choose Meeting Takeaways.
Which method should you choose?
| You want to record… | Best method |
|---|---|
| A screen video with sound | Screenshot toolbar (macOS 27) |
| A call you’re hosting | The Record button in Zoom, Meet or Teams |
| A call or webinar you need notes from | Letterly on your phone — transcript and summary in one place |
💡 Tips for a clean recording
- Do a 10-second test first. Play a sound, record, listen back. It saves you from an hour of silence.
- Check the permission. If an app records nothing, open System Settings → Privacy & Security → Screen & System Audio Recording and allow it.
- Close noisy apps. Notifications and music from other tabs end up in the recording too.
- Ask before you record. If other people are on the call, let them know and wait for their consent.
I hope this guide helps you finally record what you actually hear! 😊
Got questions? Email us at hi@letterly.app — we’re happy to help.