How to Set Up Letterly Dictation on Windows

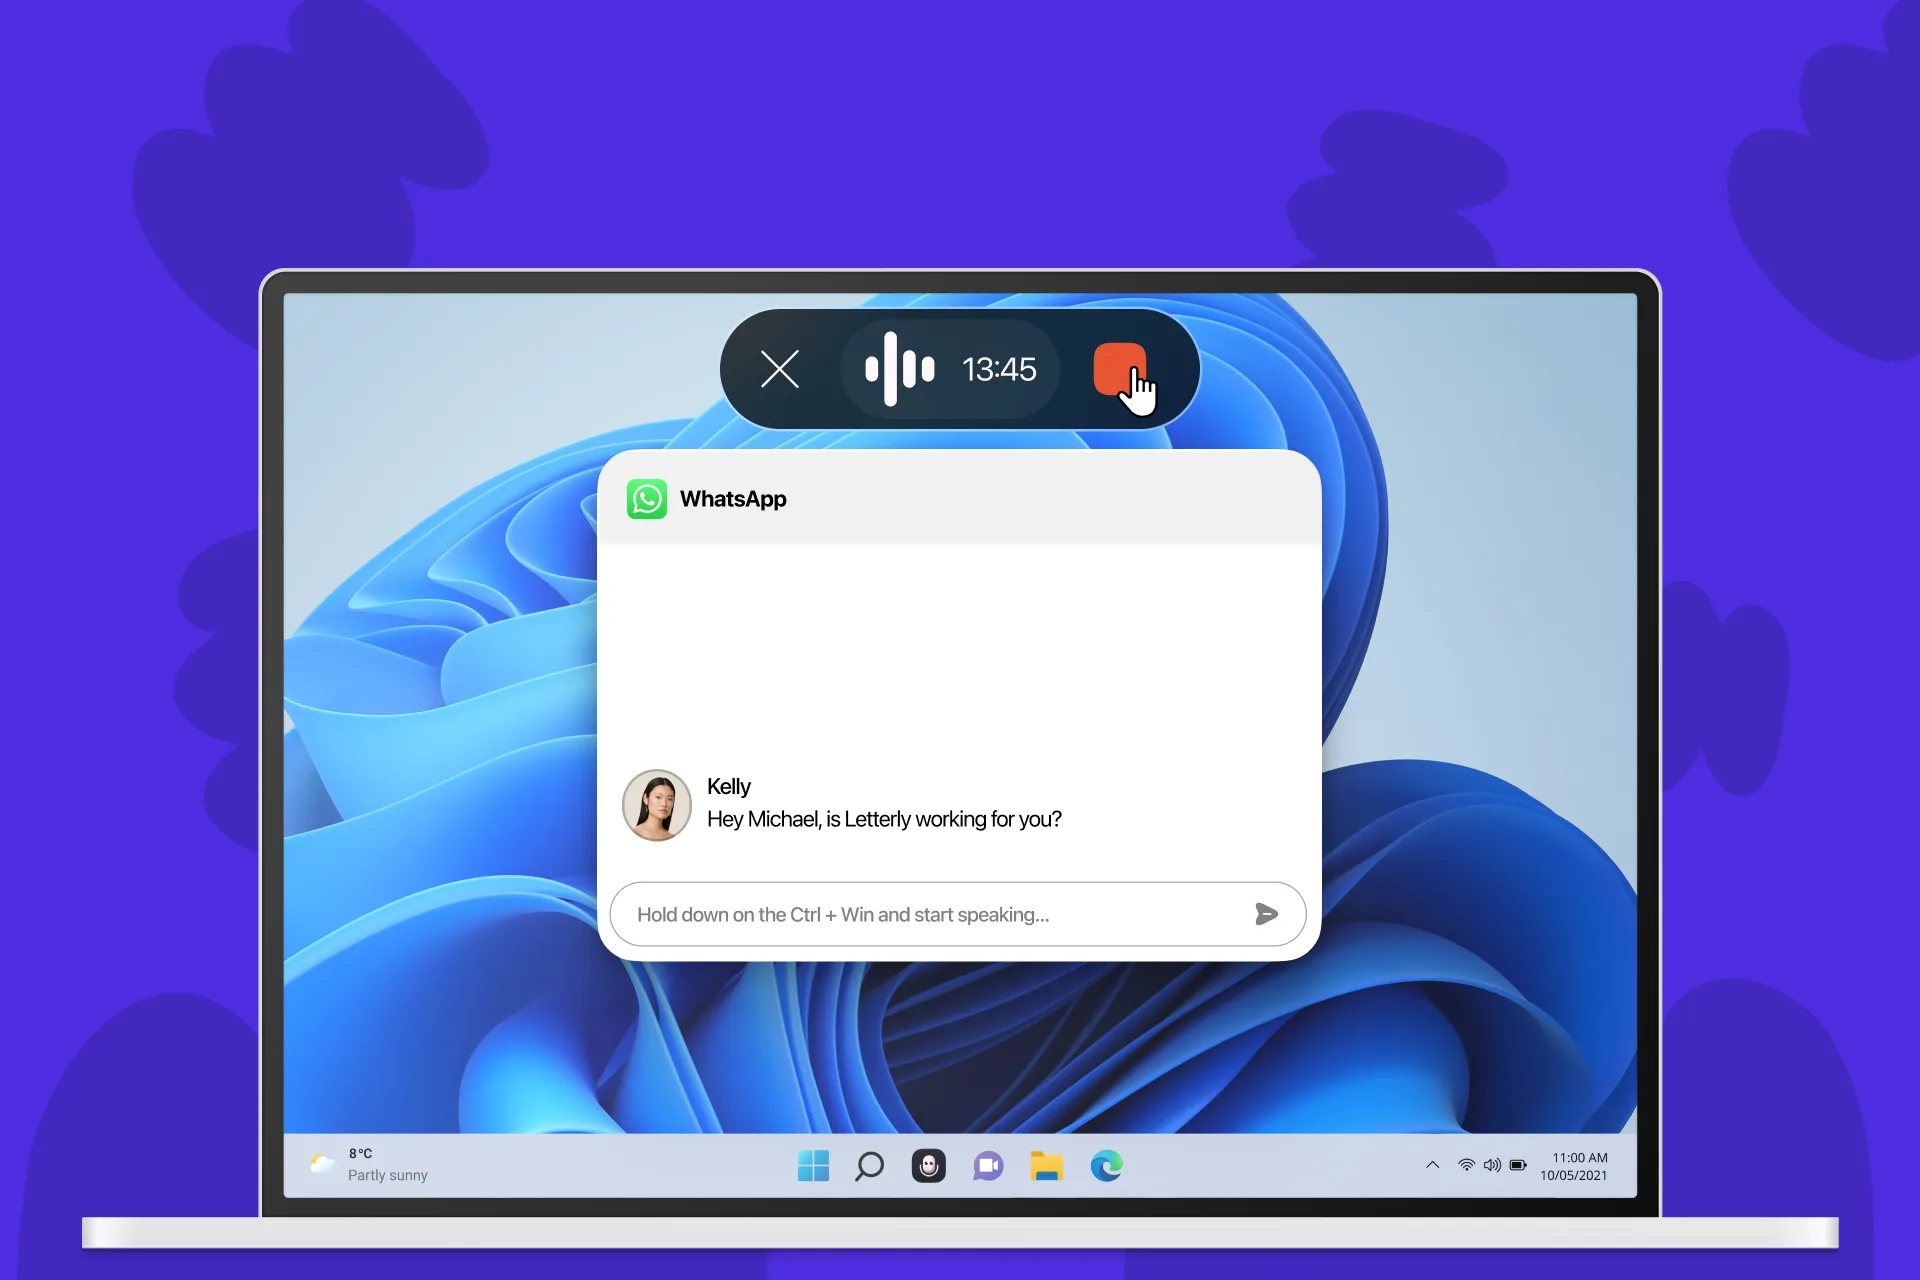
We’re really proud of Letterly Dictation, and we’d love more people to try it. With Letterly Dictation, you can use your voice wherever you already write, without opening the Letterly app every time.
If you’re on Windows and haven’t tried Letterly Dictation yet, or you’re not sure how to set it up, this guide walks you through it step by step.
We’ve split this guide into three parts:
Let’s get started 👇
I. Set up Dictation
First, let’s install Letterly and give it the permissions it needs to work across your computer.
1. Install and open Letterly
Windows → Download from the Microsoft Store and open the app.
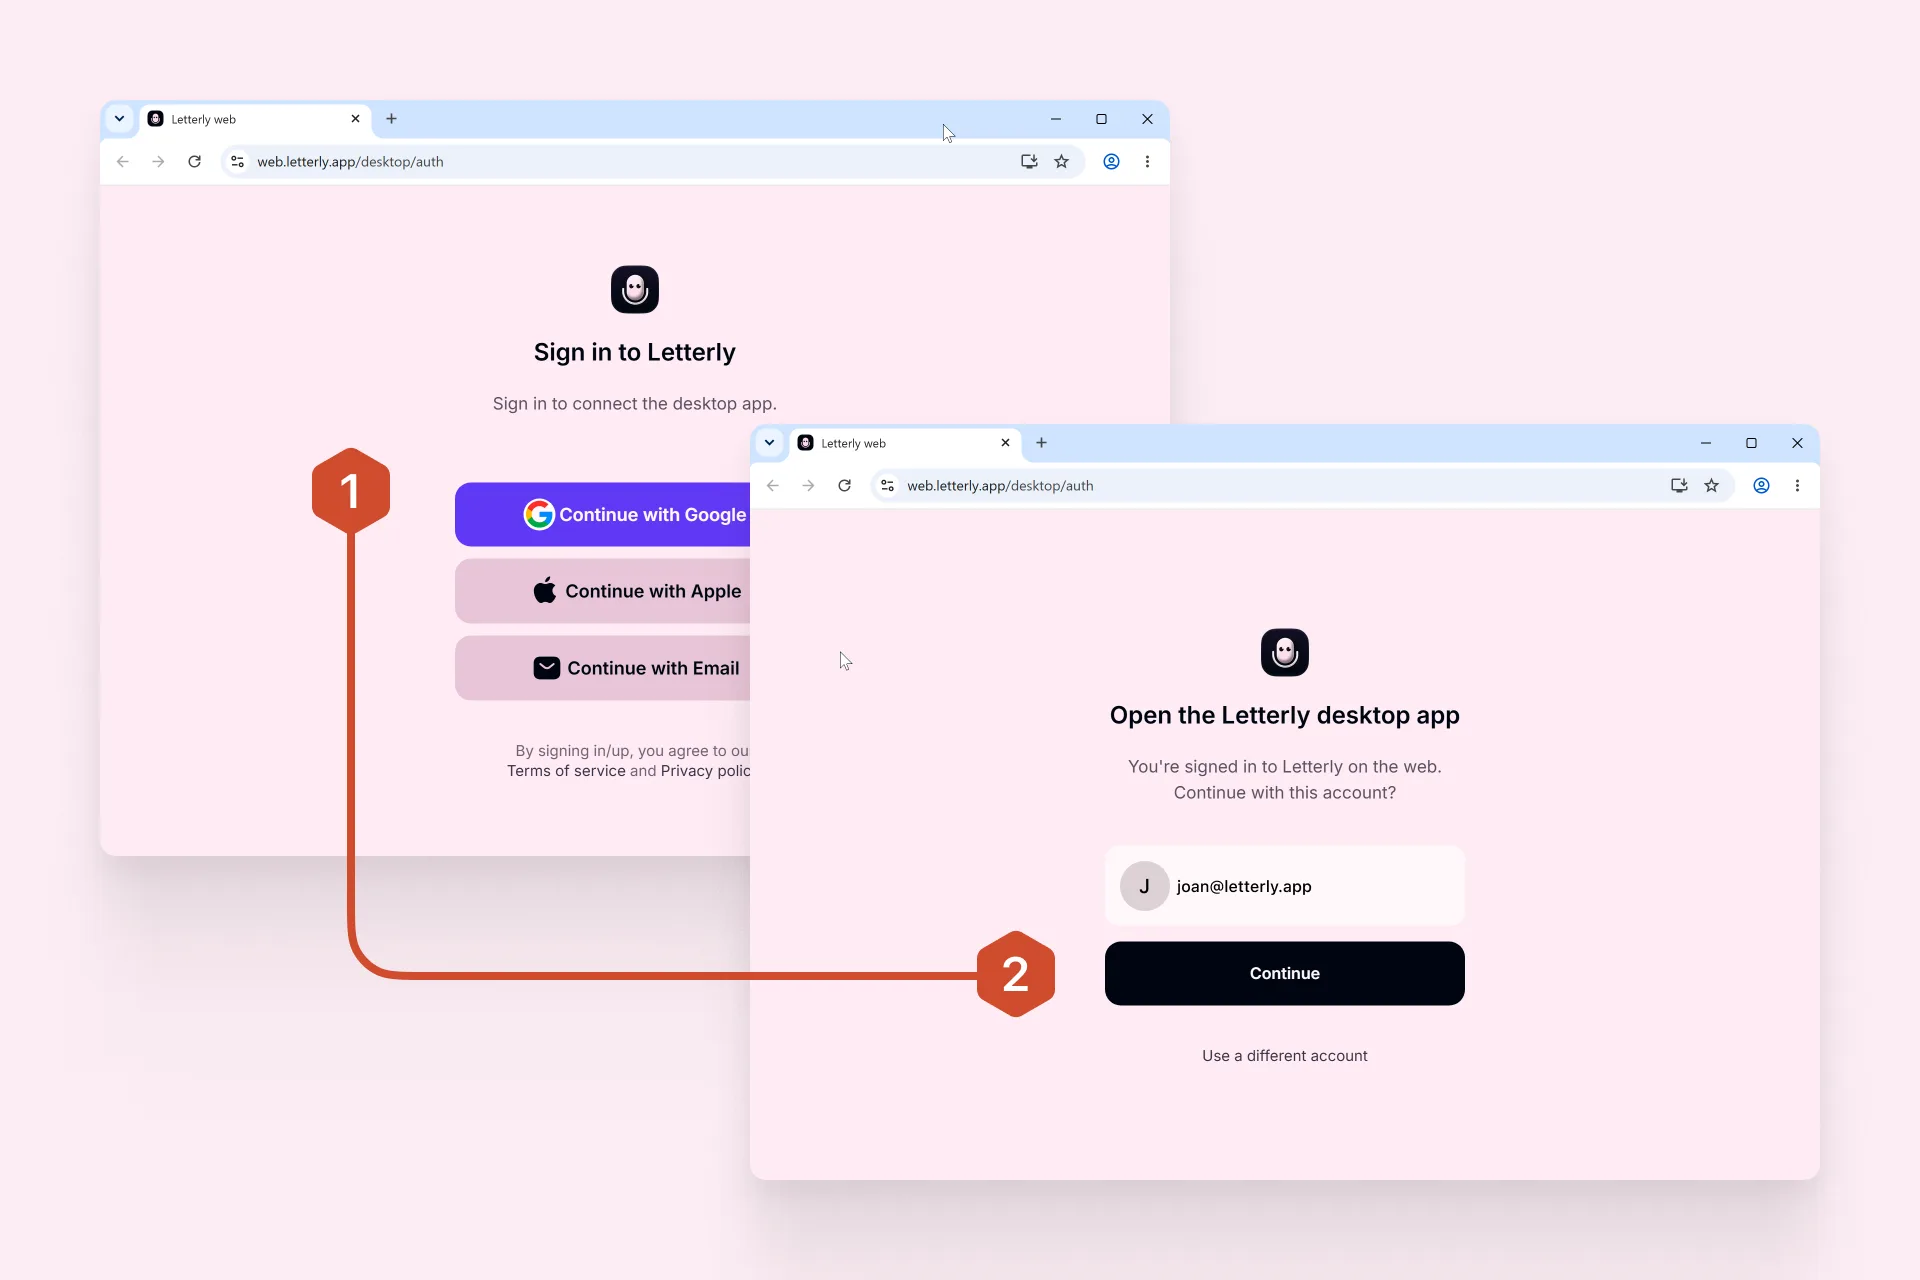
2. Sign in
- Choose Continue with Google, Continue with Apple, or Continue with Email.
- On the Open the Letterly desktop app screen, check the account and click Continue.
- The desktop app opens on its own and takes you to the Dictation setup.
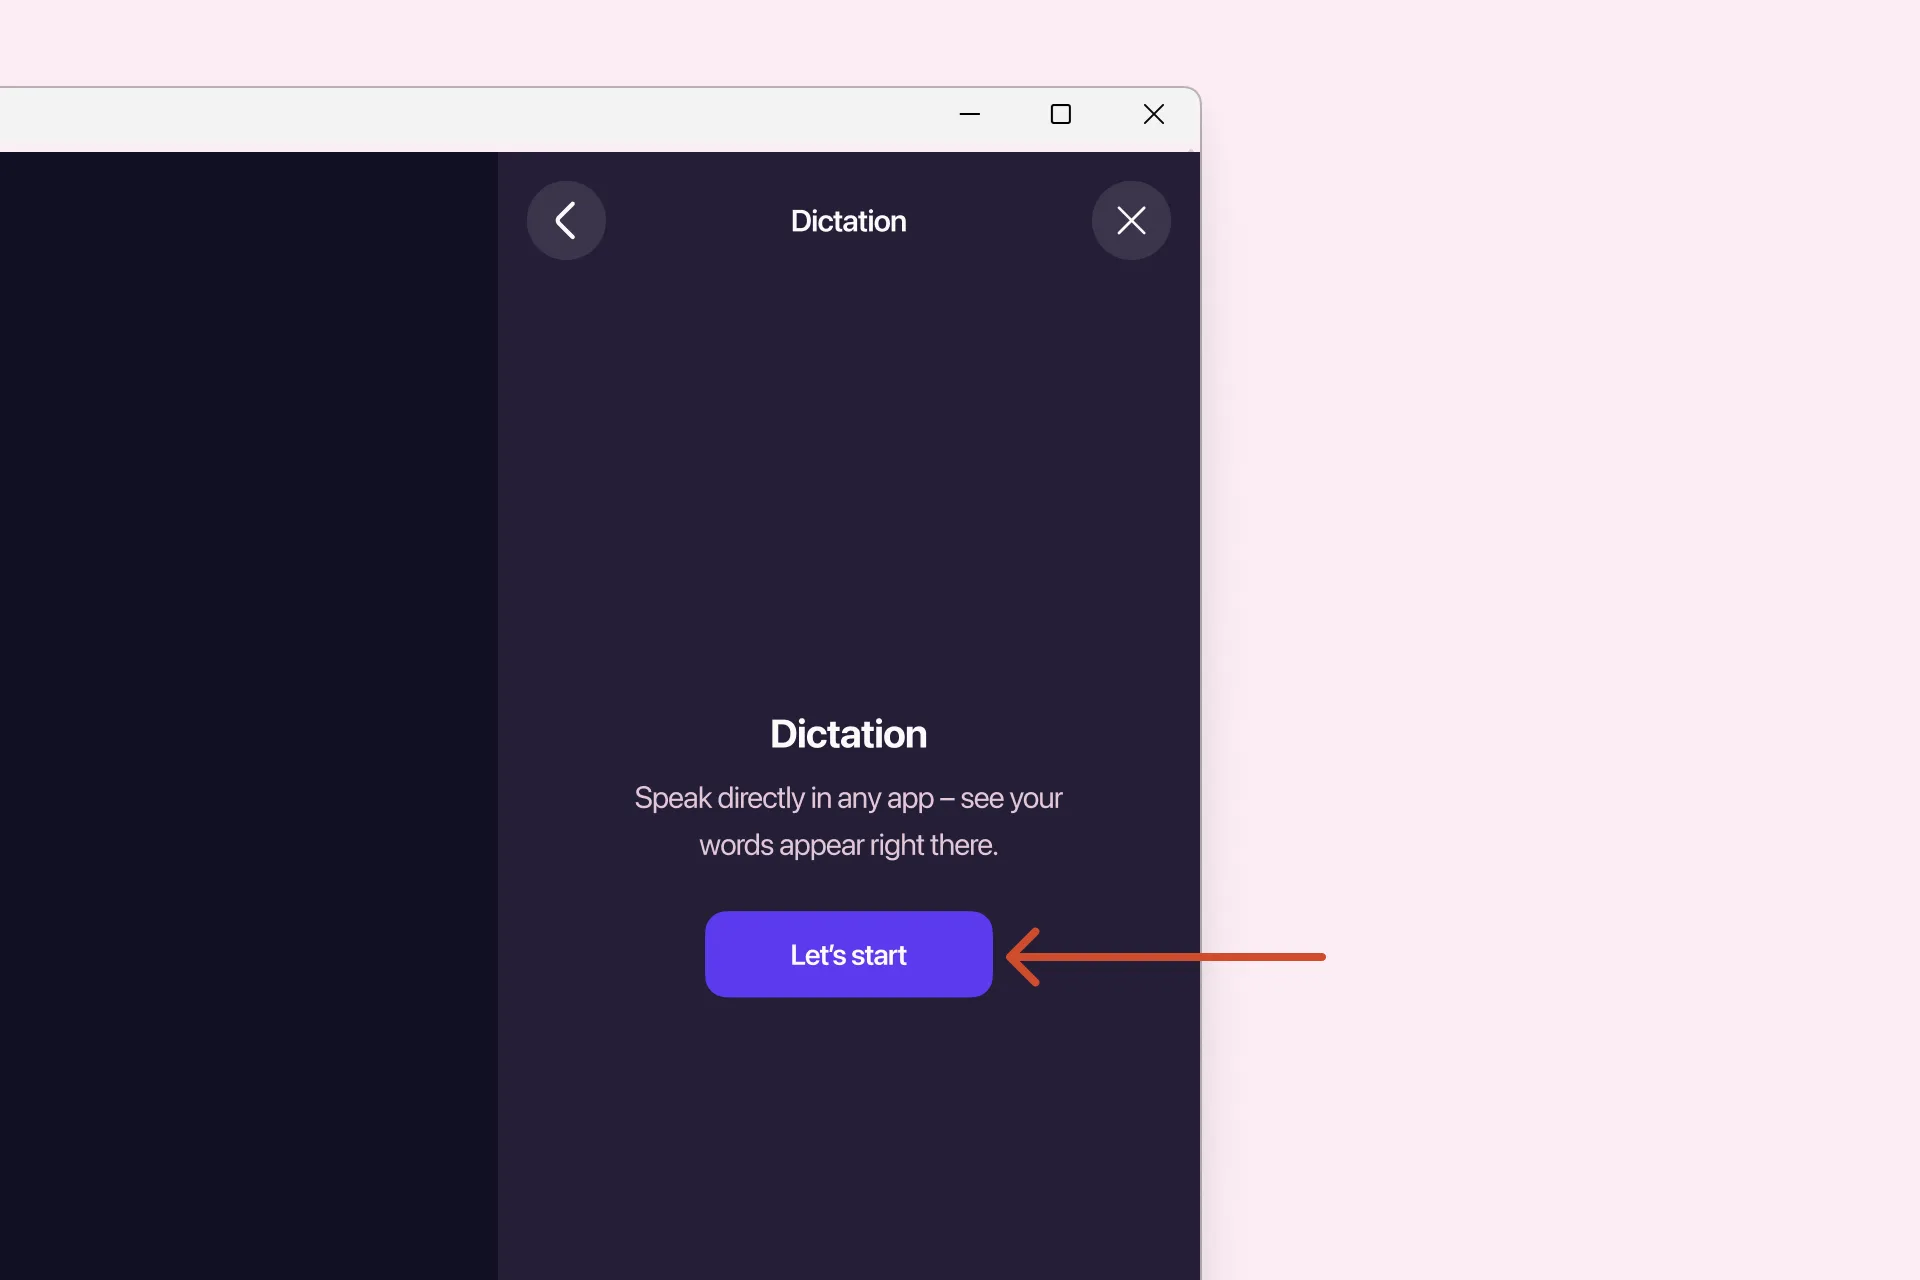
3. Open Dictation
After signing in, the app takes you straight to the Dictation setup. If you closed it, open Settings → Dictation.
4. Allow microphone access
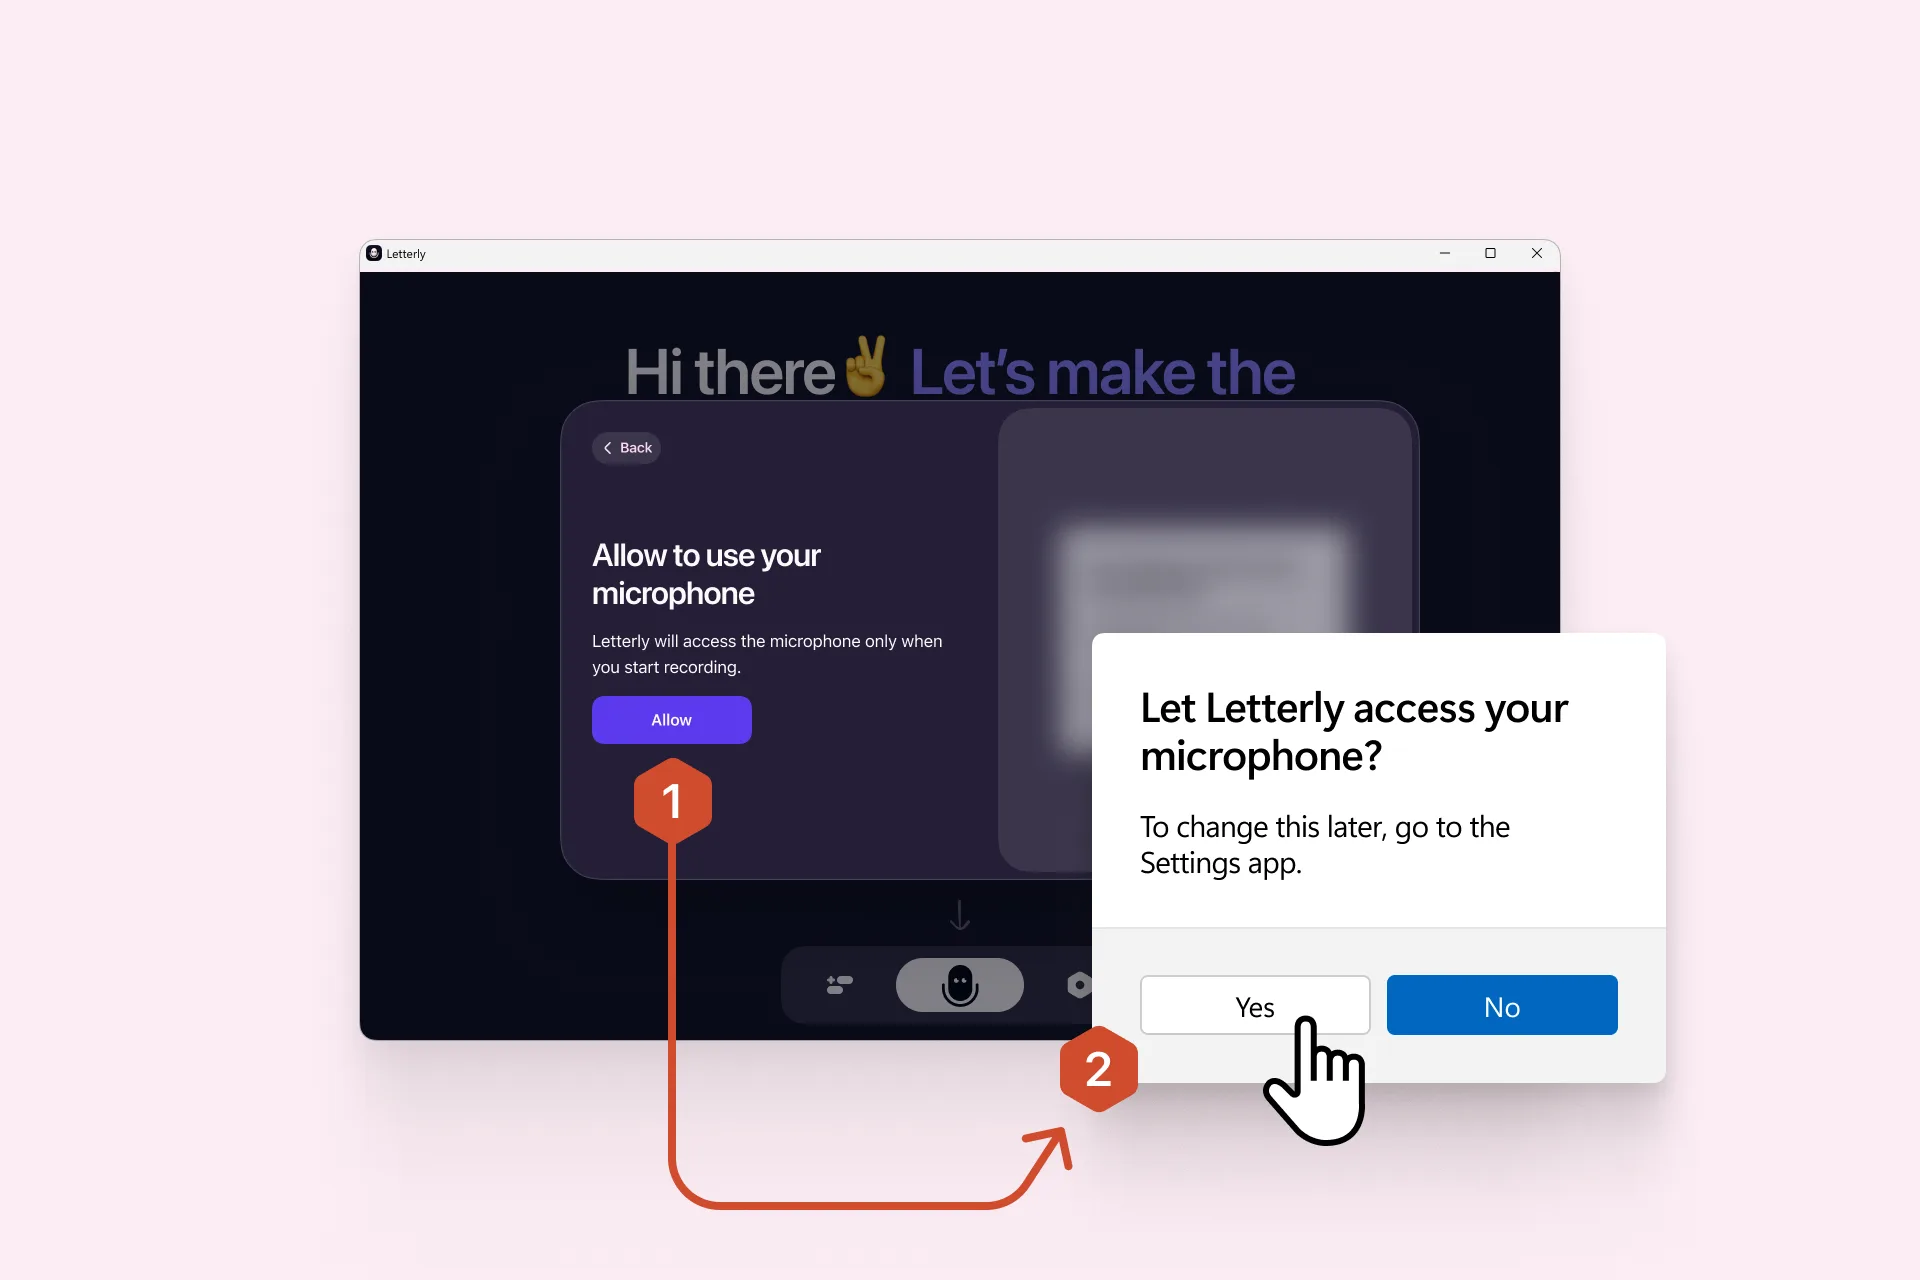
- Click Allow in Letterly.
- When the Windows permission window appears, click Yes.
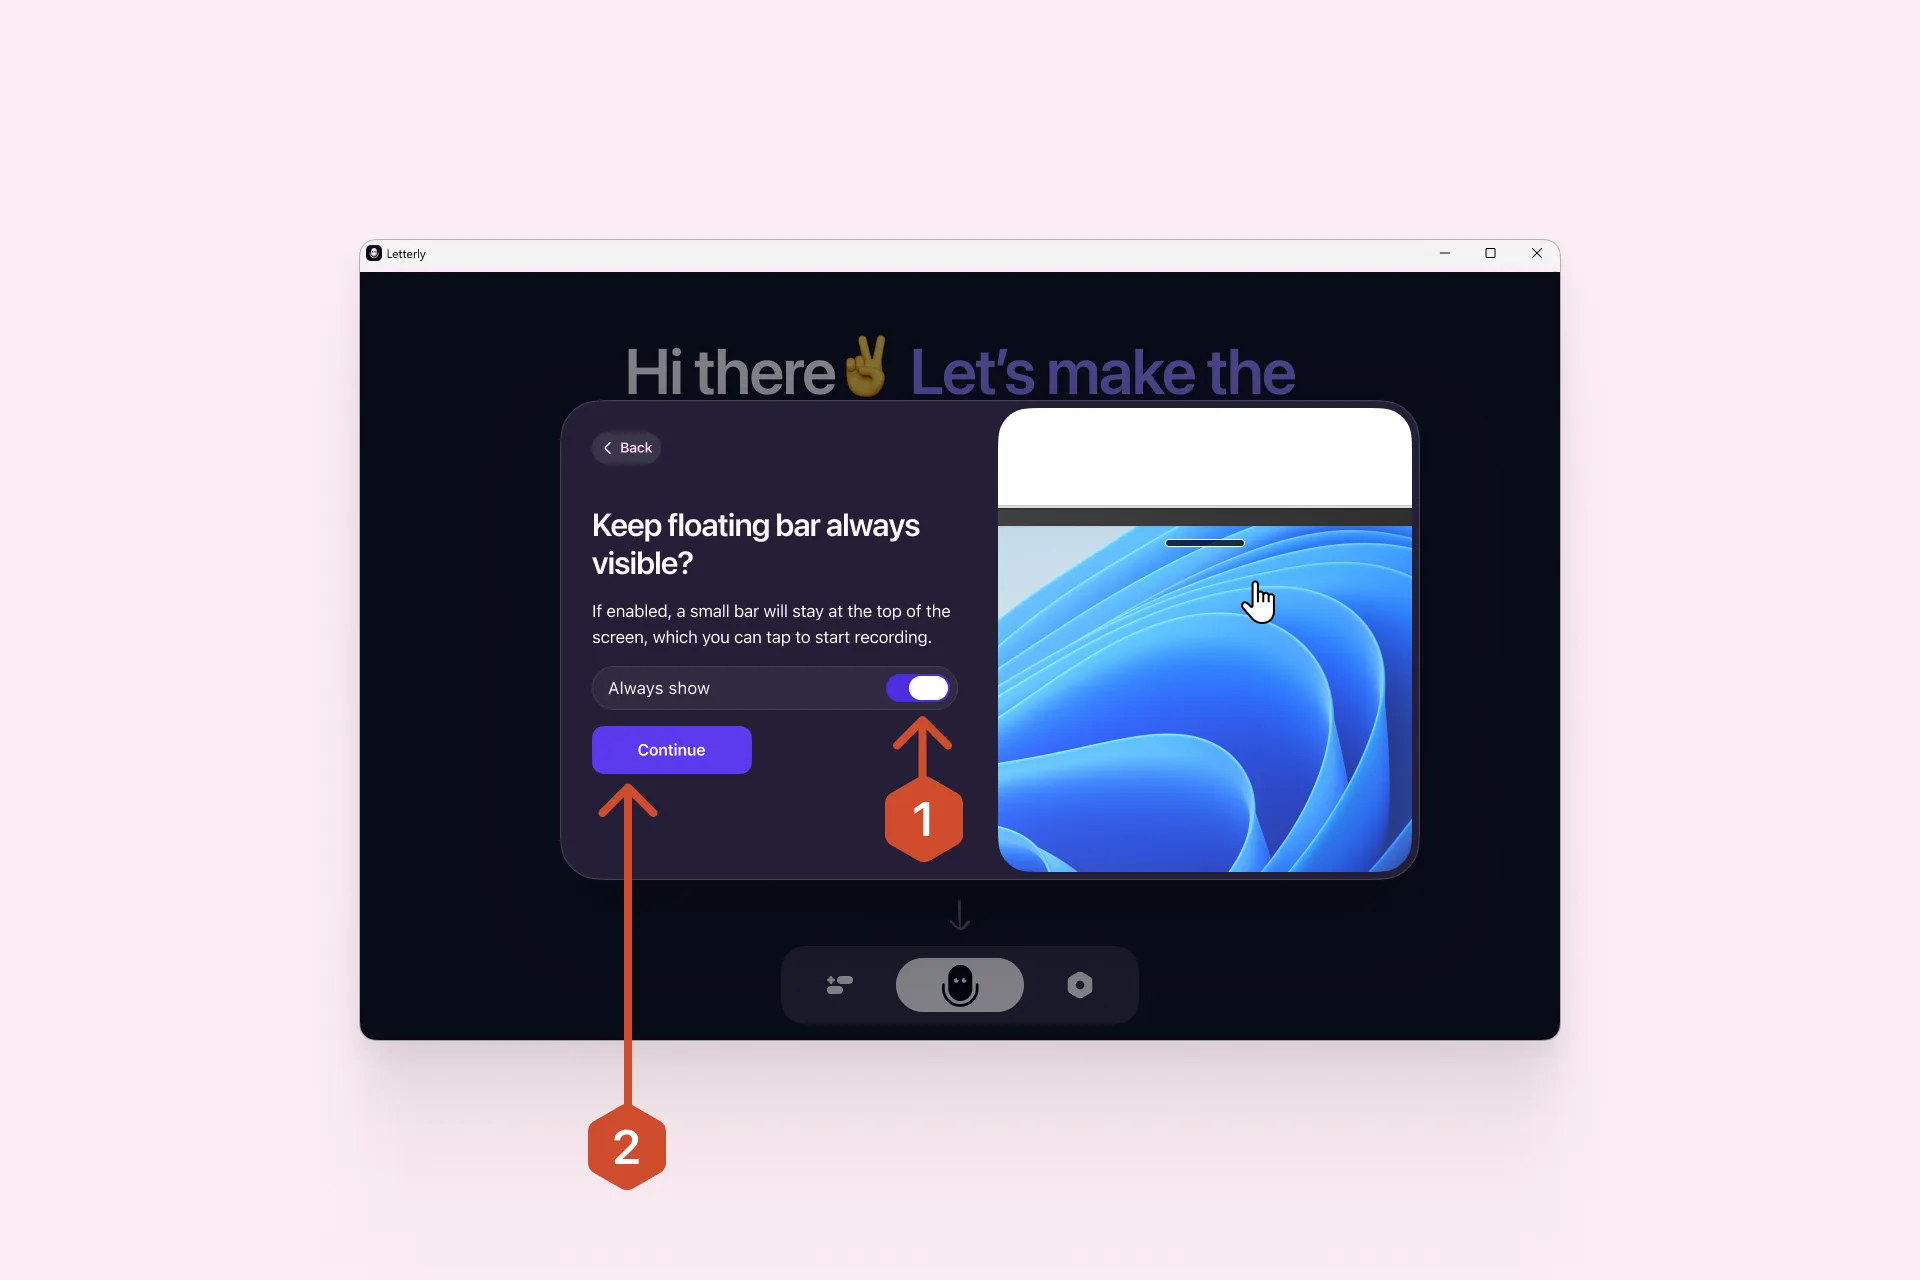
5. Choose your floating bar setting
Floating bar is small on-screen control you can click to start recording anytime, even when Letterly isn’t in focus.
Next, you’ll decide whether the floating bar should always stay visible.
- Turn on Always show if you want it visible at all times.
- Click Continue.
6. Check your shortcut
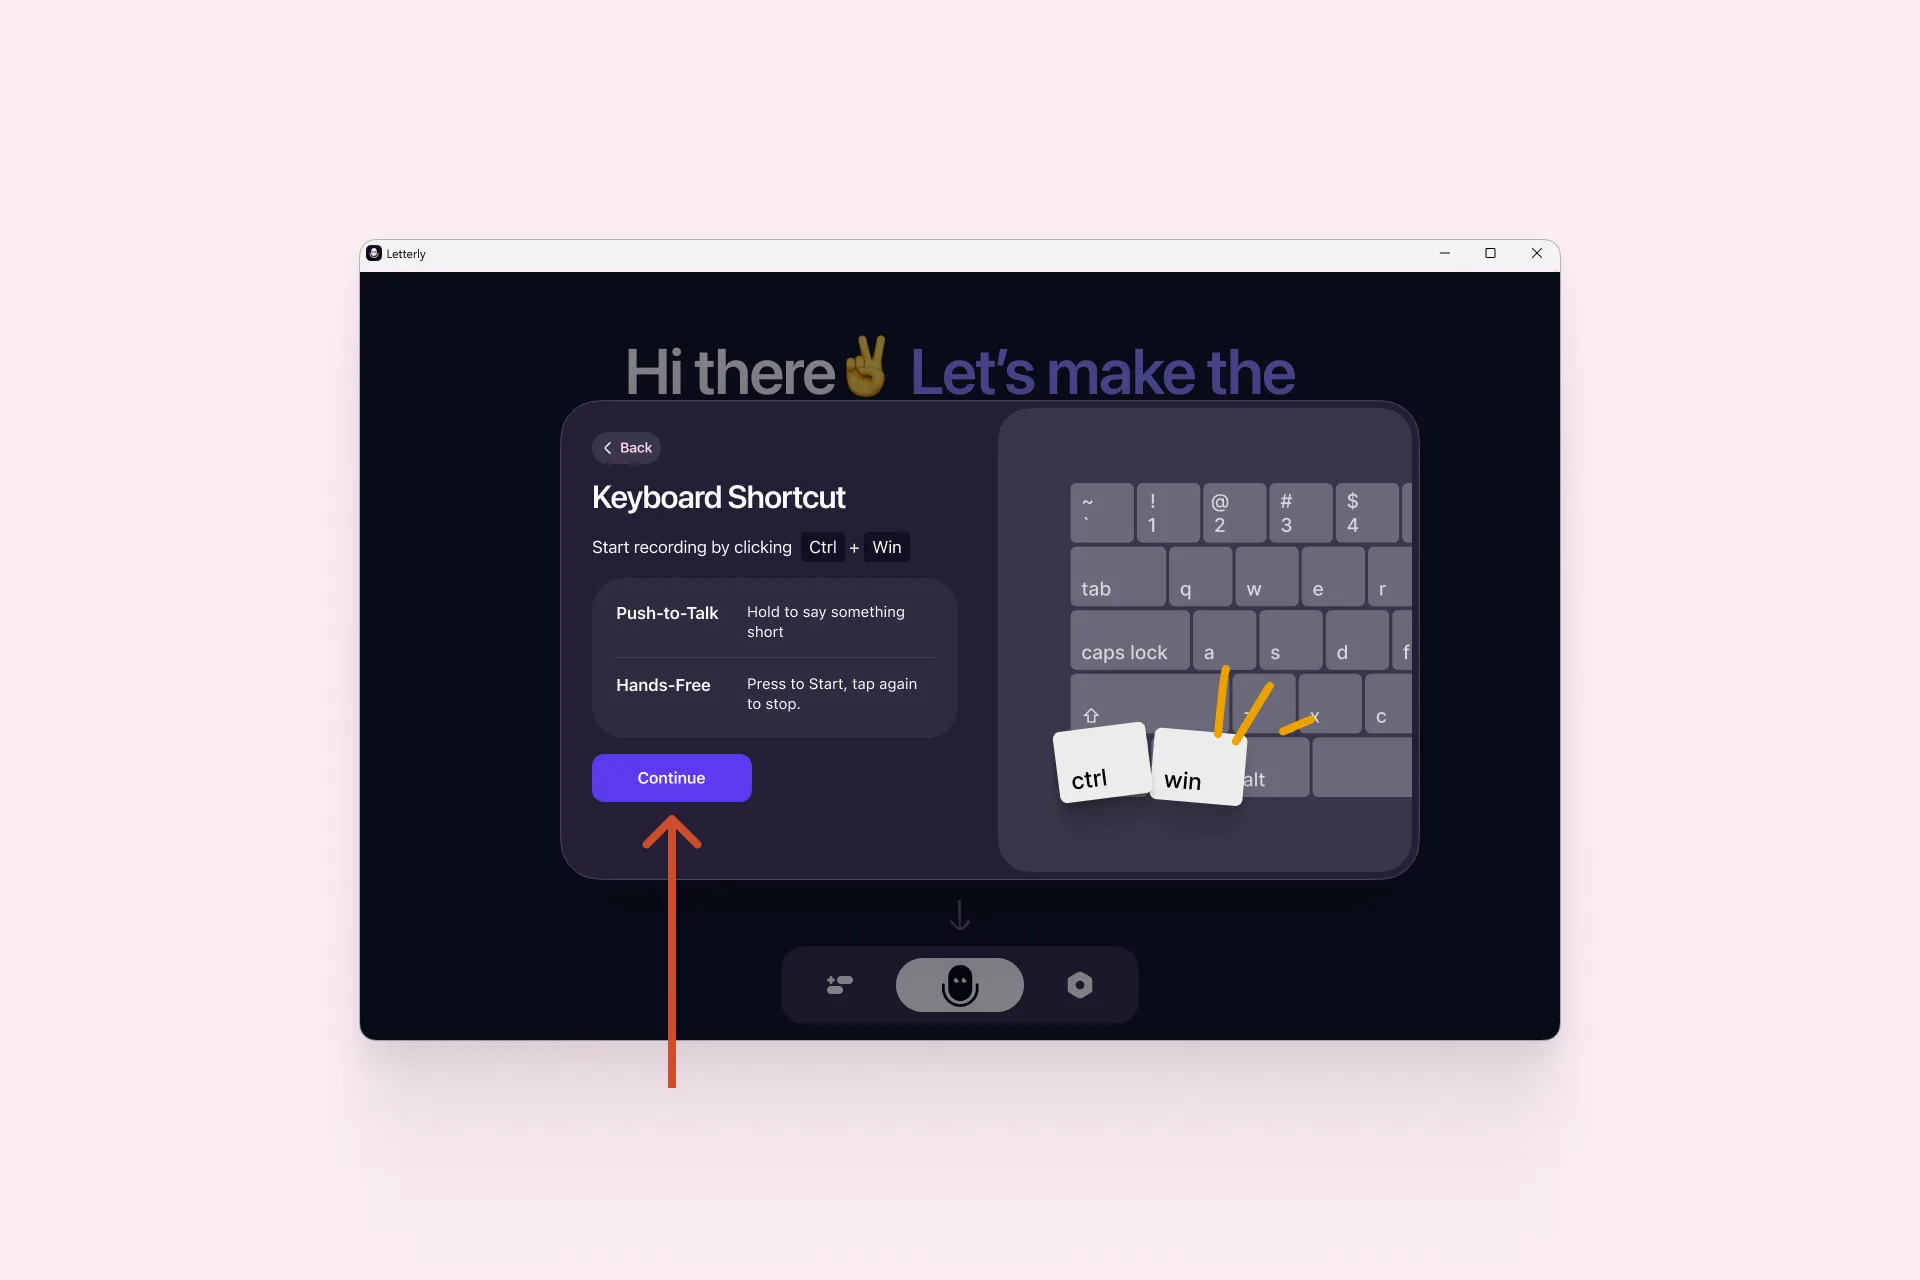
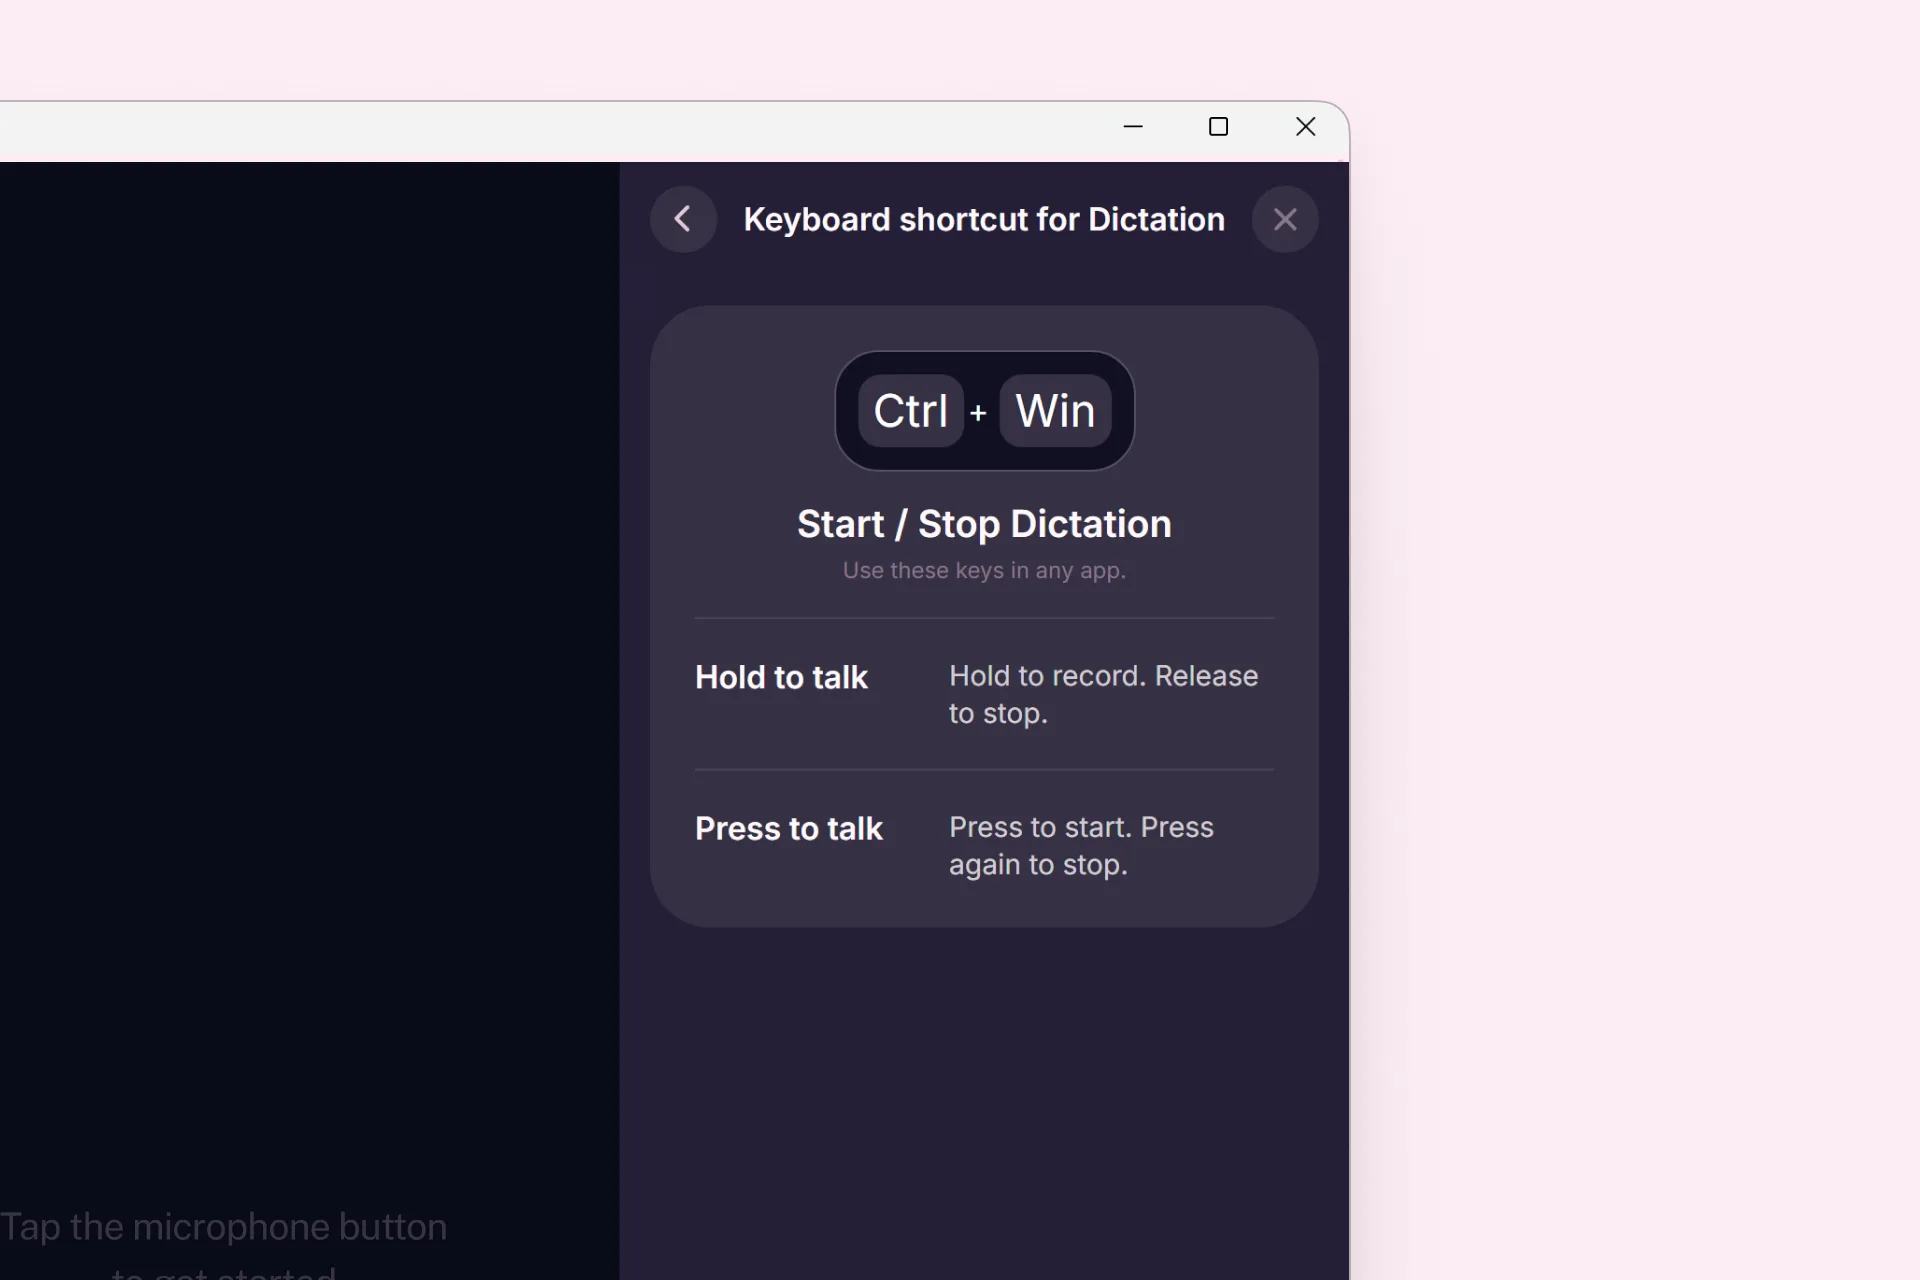
Your default shortcut for starting a recording is Ctrl + Win. It works two ways:
- Hold to talk — hold the shortcut for something short.
- Press to talk — press once to start, press again to stop.
Click Continue.
That’s it for setup. Both of those choices are just defaults — Part II shows you how to change them, along with everything else. 👇
II. Customize Dictation
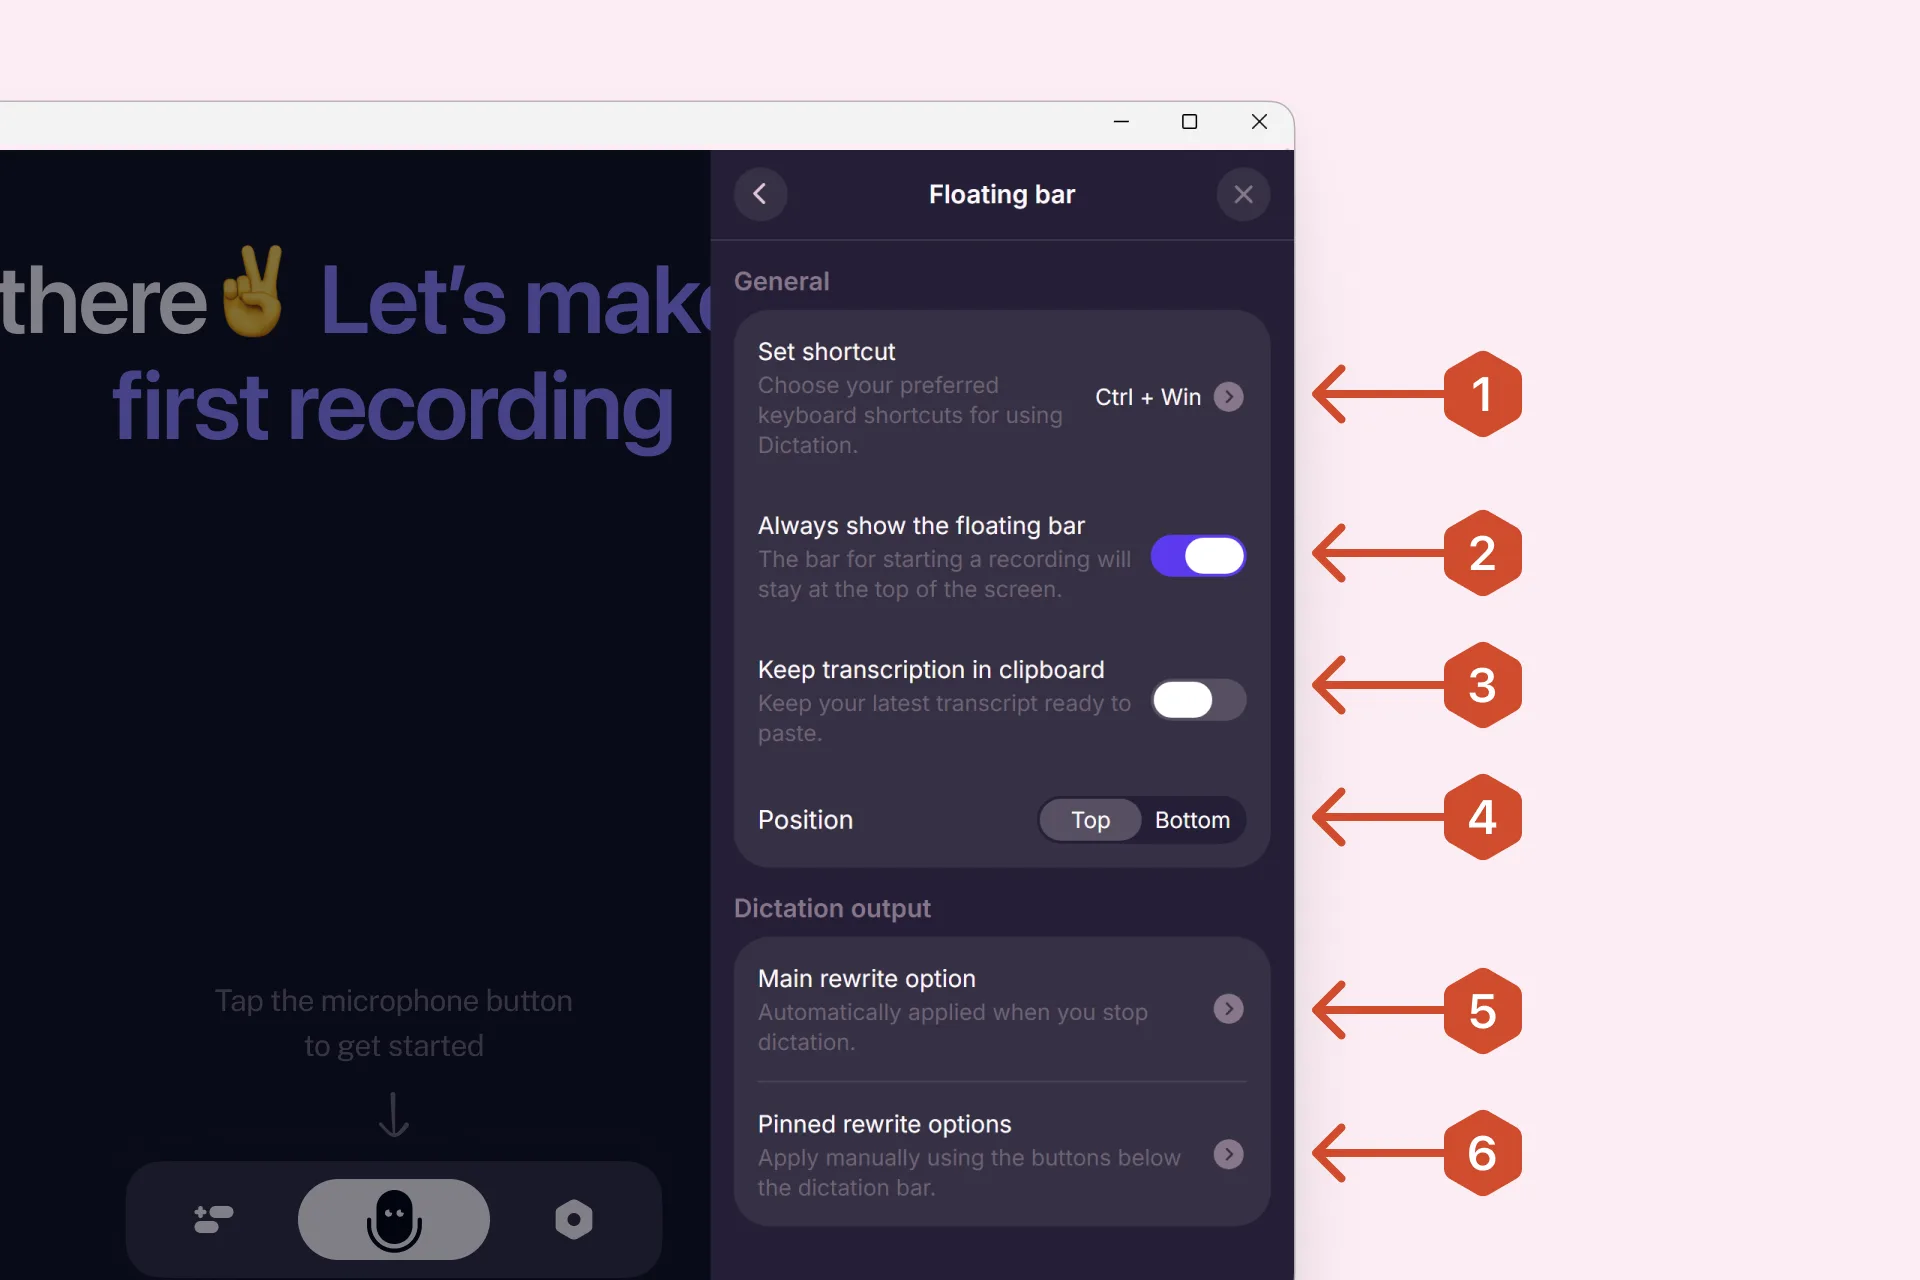
In the Letterly app, open Settings → Dictation → Floating bar.
In Floating bar settings, you’ll see:
General
The General group covers how you start dictation and where the bar sits.
1. Set shortcut
Sets the keyboard shortcut that triggers dictation. The default is Ctrl + Win. Click the arrow to change it to a combination that works better for you.
2. Always show the floating bar
When on, the floating bar stays visible at all times. Turn it off if you’d rather it only appear when needed; your shortcut still works either way.
3. Keep transcription in clipboard
When this is on, every finished dictation is also copied to your clipboard, so the text is ready to paste with Ctrl + V.
It works as a safety net. If there was no cursor in a text field, or the app you were writing in refused the text, nothing is lost — click where you need it and paste.
Turn it off if you would rather Letterly did not touch your clipboard — for example, when you copy other things while you dictate.
4. Position
Choose where the floating bar sits on your screen: Top or Bottom.
Dictation output
Letterly can automatically clean up or rewrite your text after you finish dictating.
There are two types of rewrite options:
- Main rewrite option: Applied automatically after every dictation.
- Pinned rewrite options: Quick alternatives you can choose from the floating bar.
5. Main rewrite option
Your Main rewrite option controls how Letterly automatically processes your text when you finish dictating.
By default, Letterly uses the System option. It keeps the text close to what you said while removing filler words, adding punctuation, and making it easier to read.
You can choose any rewrite option as your main one. Pick the format you use most often, such as Structured, List, Short Summary, Journal Entry, and more.
To get your dictation without any rewriting, choose Raw Transcript.
6. Pinned rewrite options
Pinned rewrite options appear below the recording controls on the floating bar.
Pinned rewrite options let you quickly choose how to rewrite your current dictation, for example as Structured, List, Short Summary, Journal Entry, and more. You can pin several options at once, and they’ll all appear on the floating bar. To apply one, click it.
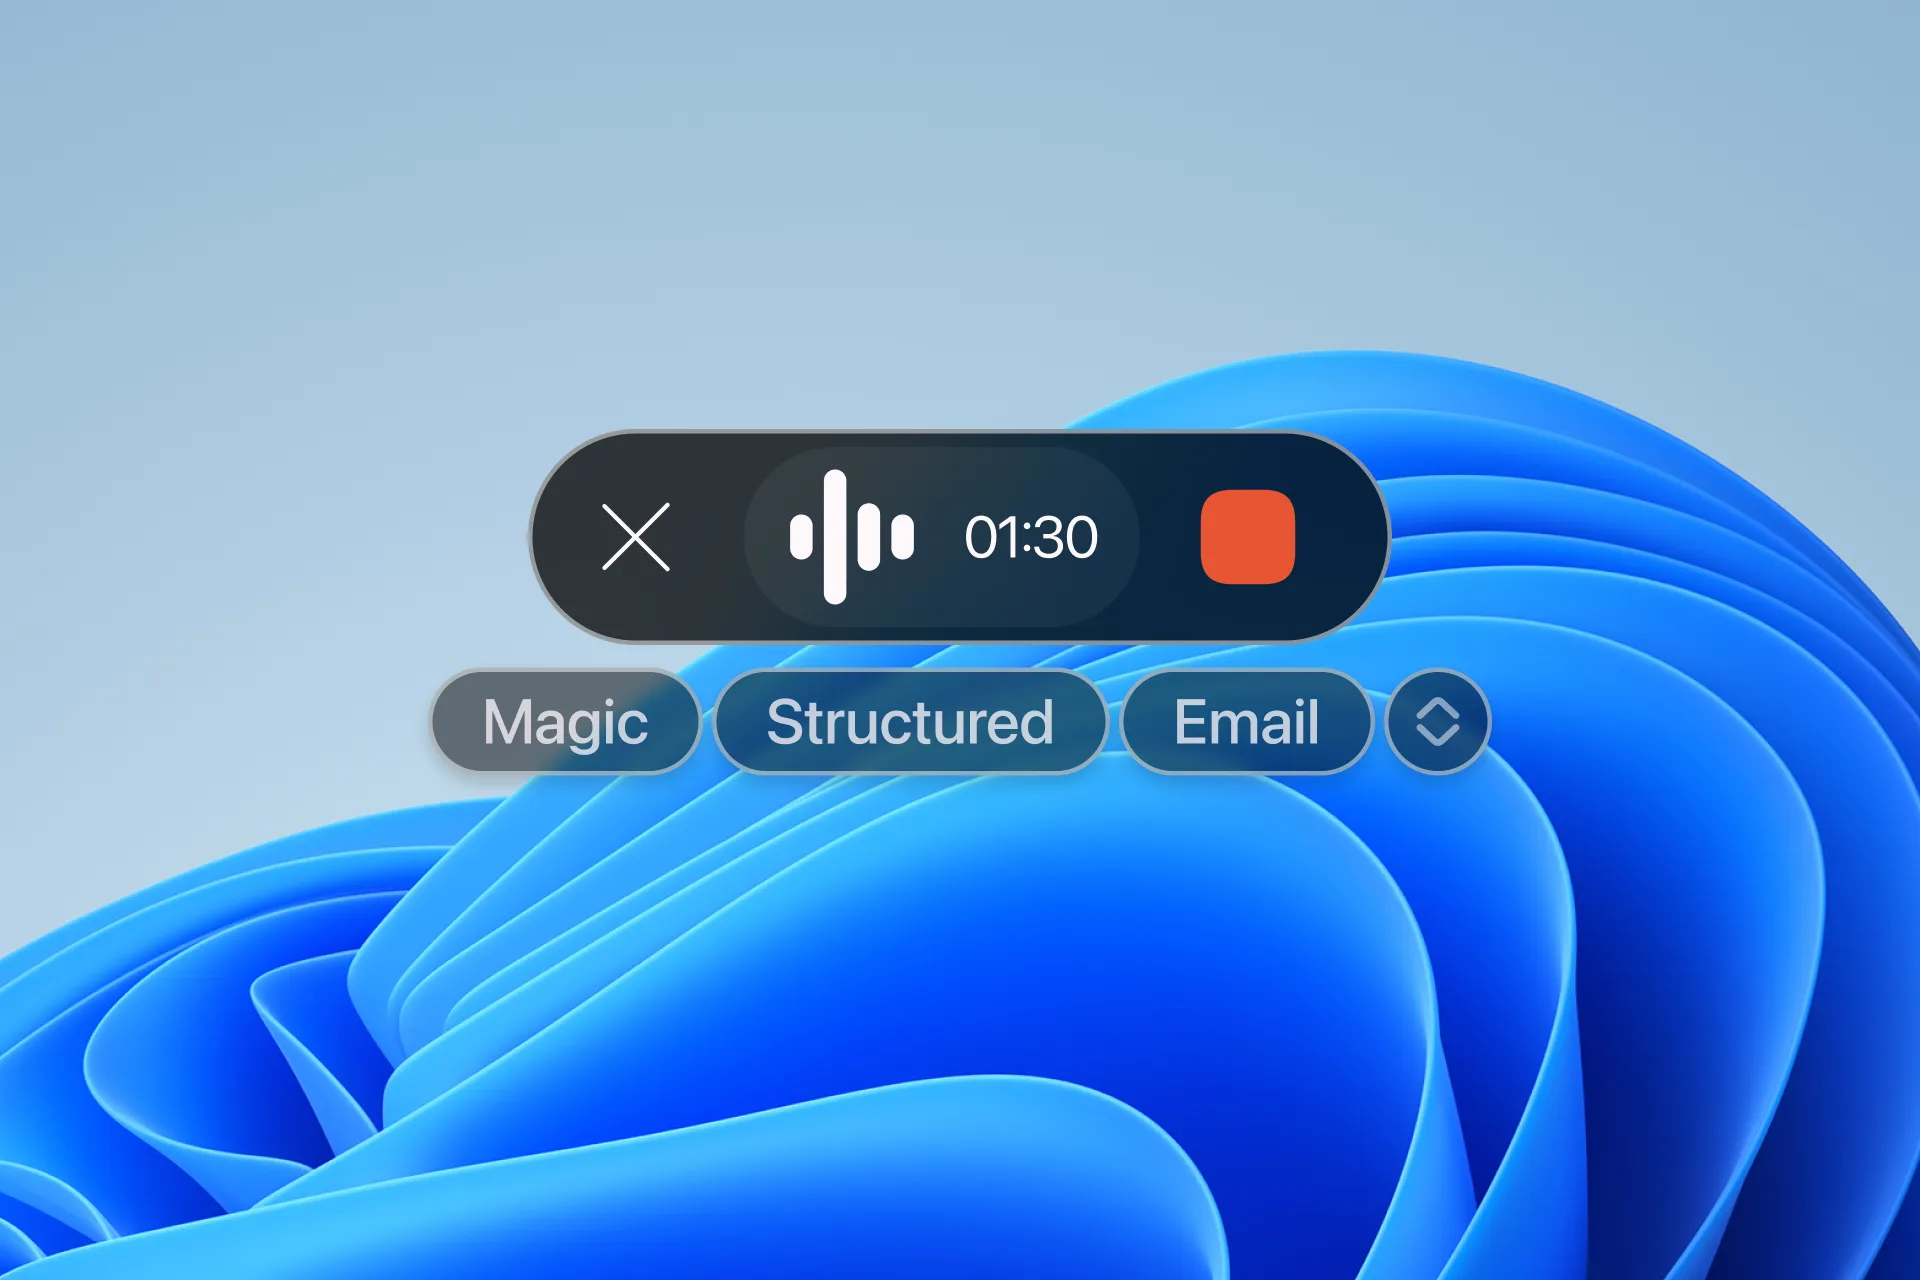
How to choose pinned rewrite options:
Go to Settings → Dictation → Floating bar → Pinned rewrite options, then click the pin icon next to each option you want to pin.
III. Use Dictation
You can use Letterly Dictation in any app. Press your shortcut or click the floating bar to start.
1. Before you dictate
Click where you want the text to appear — inside an email, message, document, note, or any other text field.
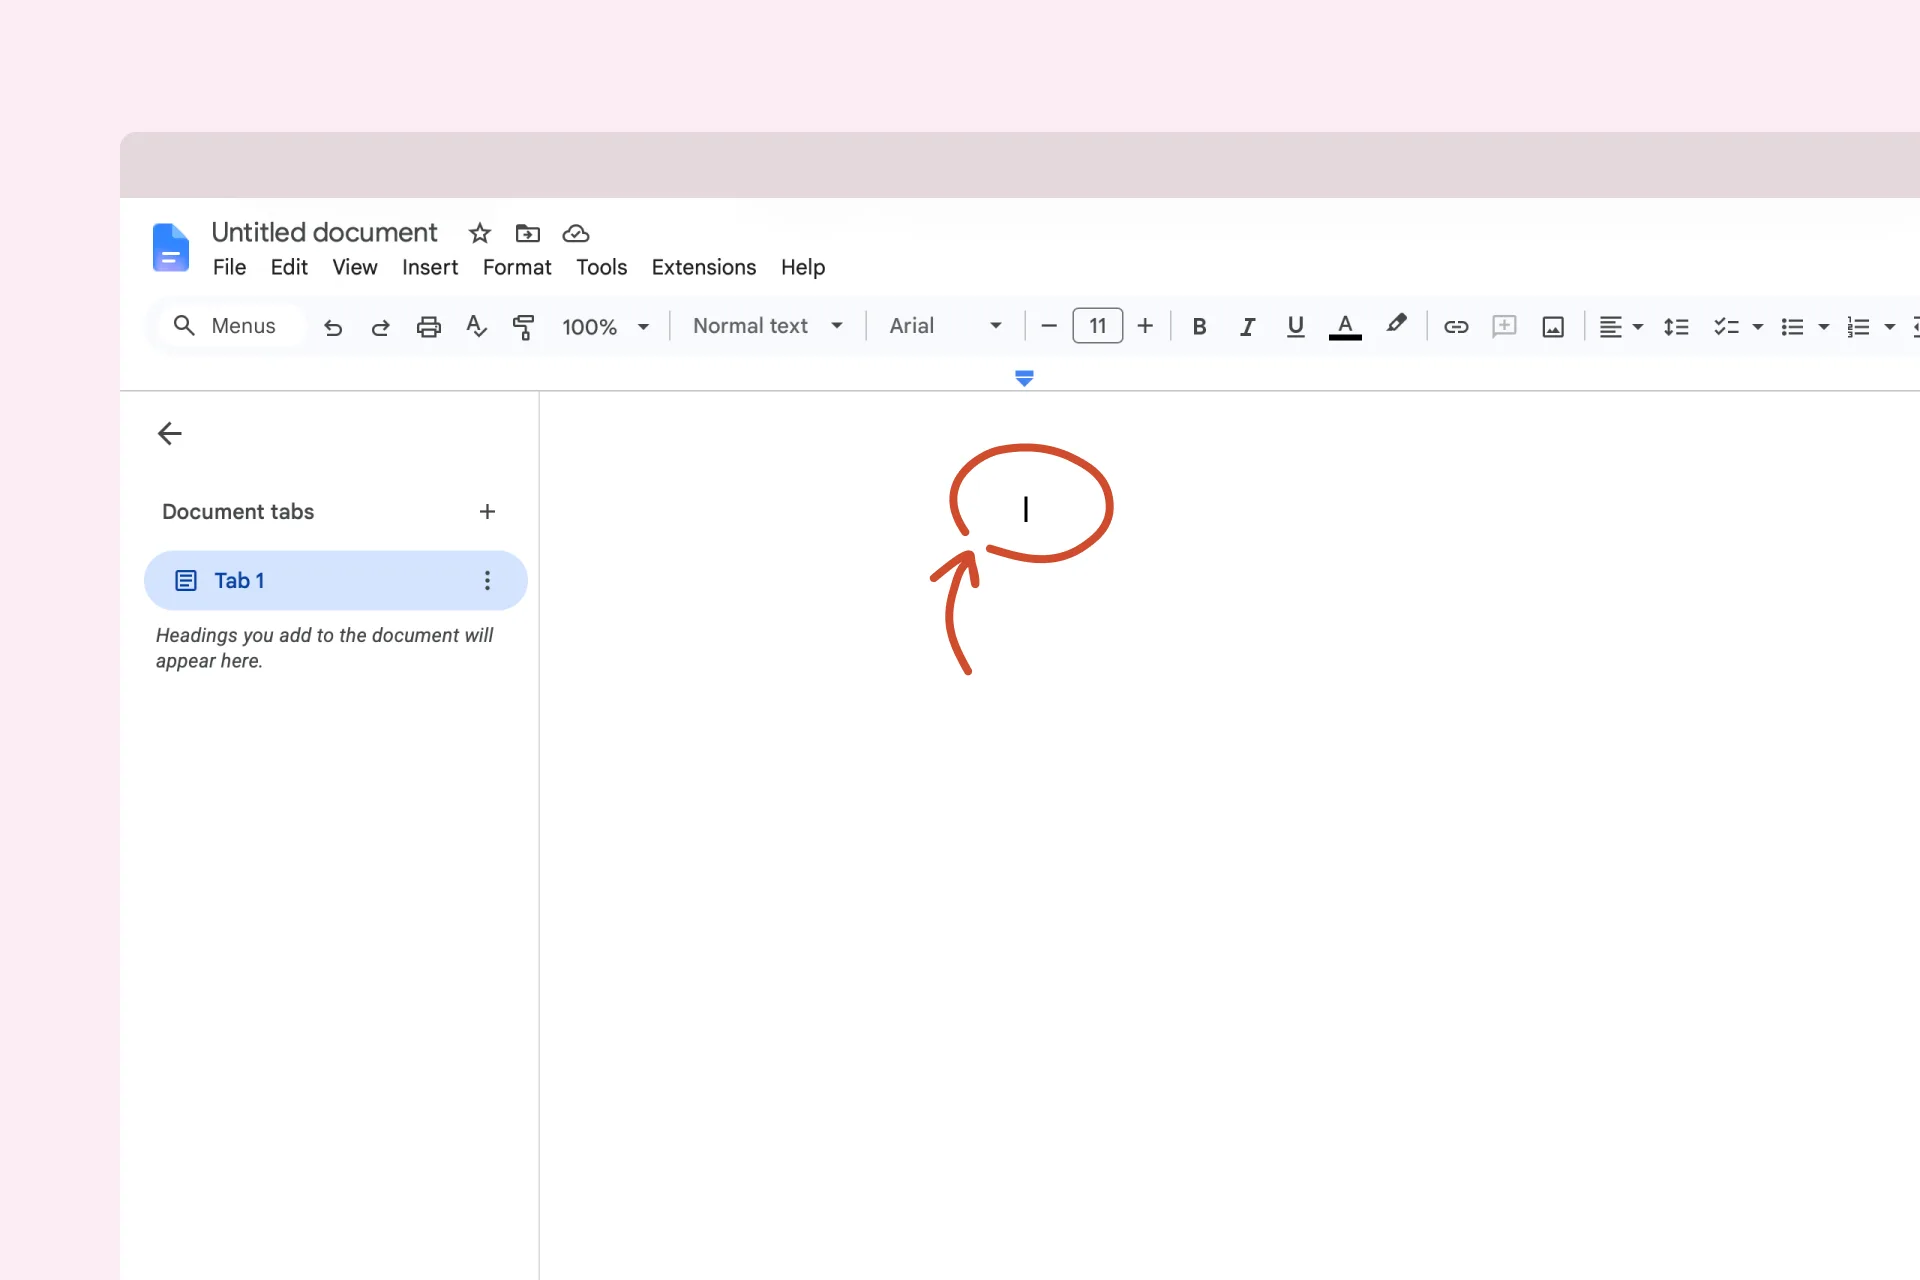
2. While you’re recording
The floating bar gives you these controls:
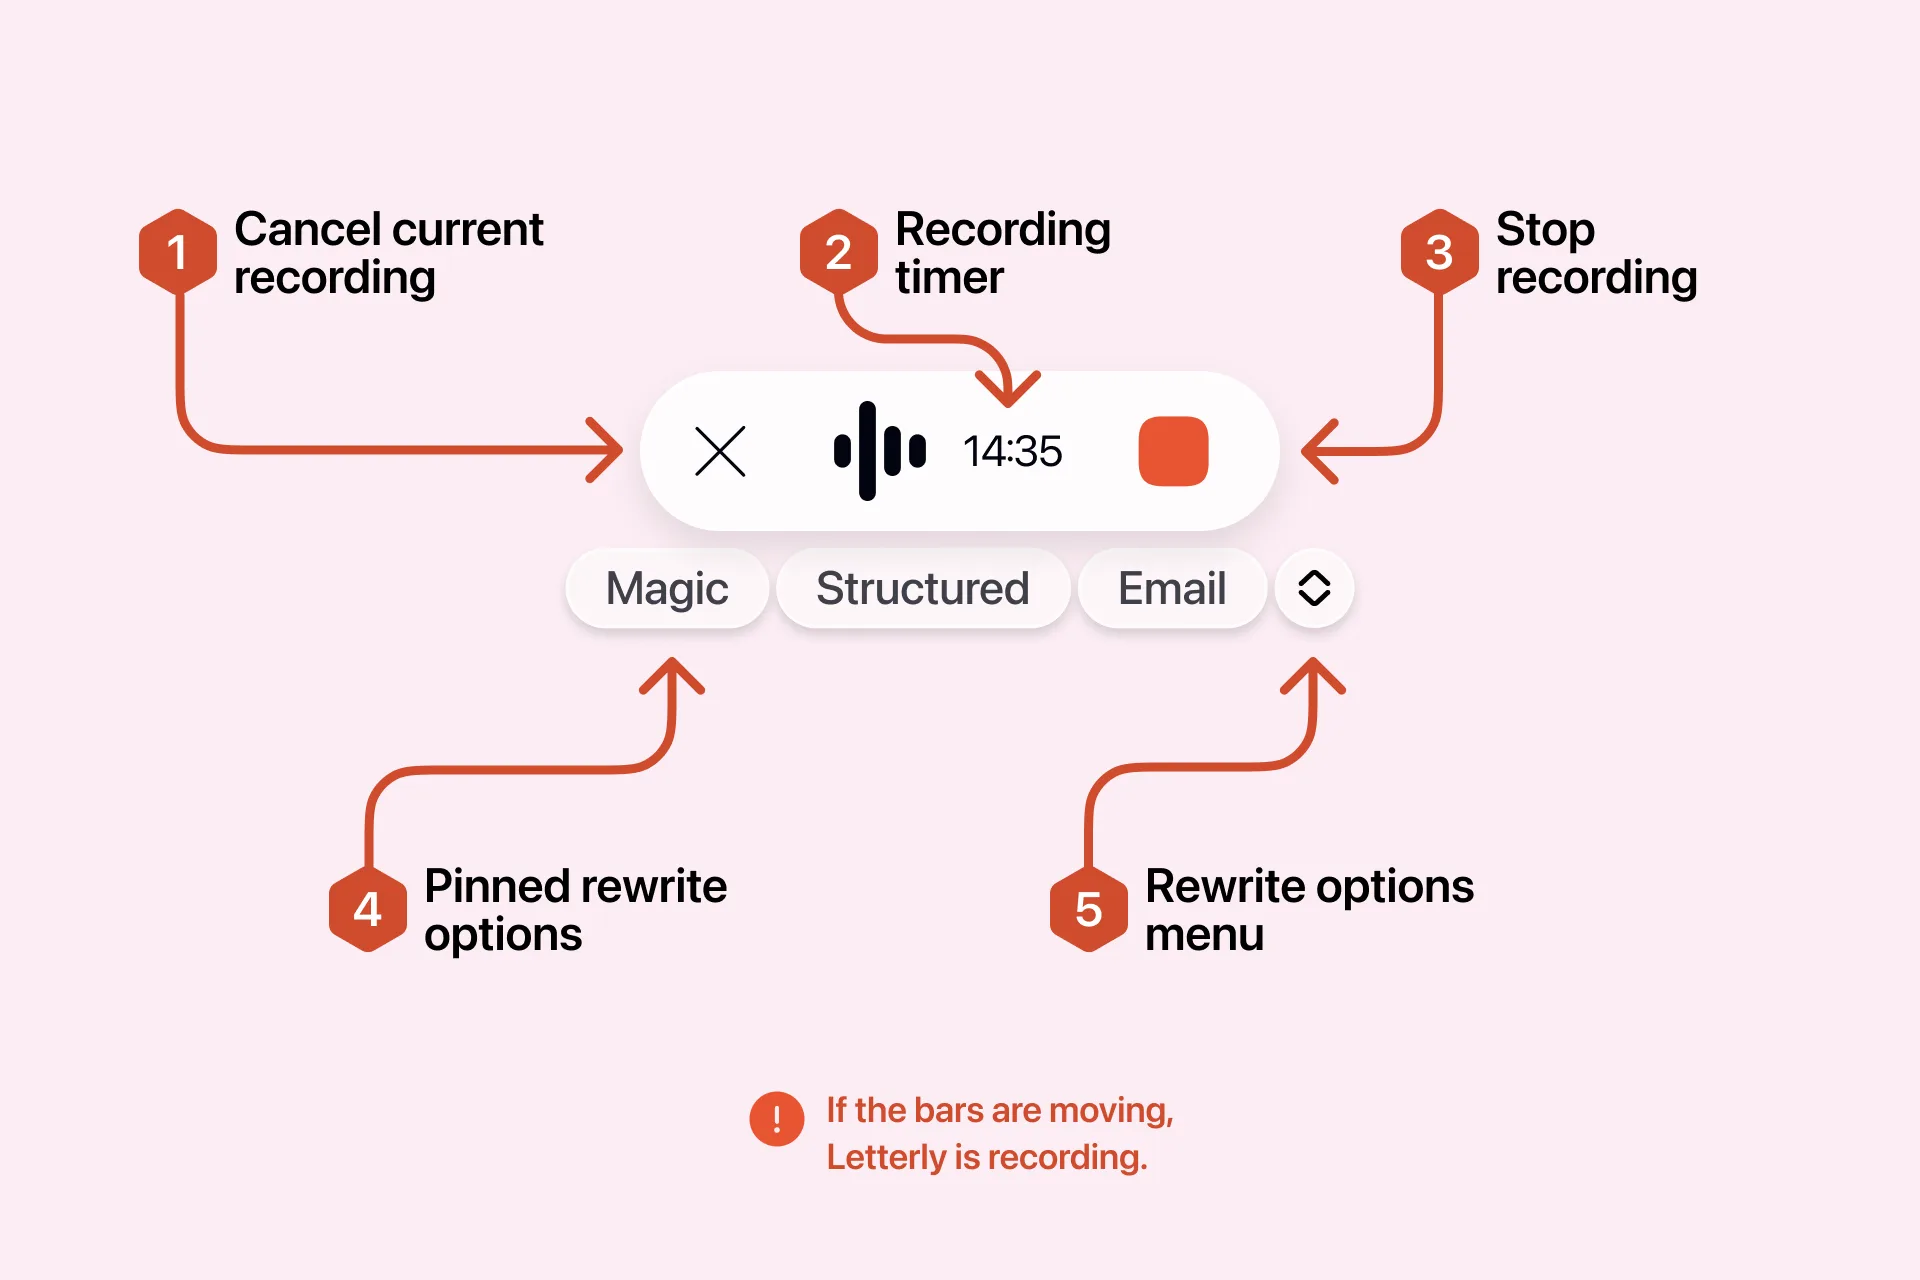
- Cancel — click X to discard the current dictation.
- Timer — shows how long you’ve been dictating.
- Stop — click the red button to finish and process your text.
- Pinned rewrite options — click one, or use its keyboard shortcut, to apply it to your dictation.
- Rewrite options menu — click the arrows to open the full list.
3. After you dictate
Letterly processes your speech and inserts the text at your cursor.
Your latest dictation is also copied to the clipboard automatically — if the text wasn’t inserted, place your cursor where you want it and press Ctrl + V.
4. History
Every dictation is saved so you can find, reuse, or clean up past sessions. Open Settings → History. Entries are organized by date, most recent first.
Right-click (or click and hold) any entry for quick actions:
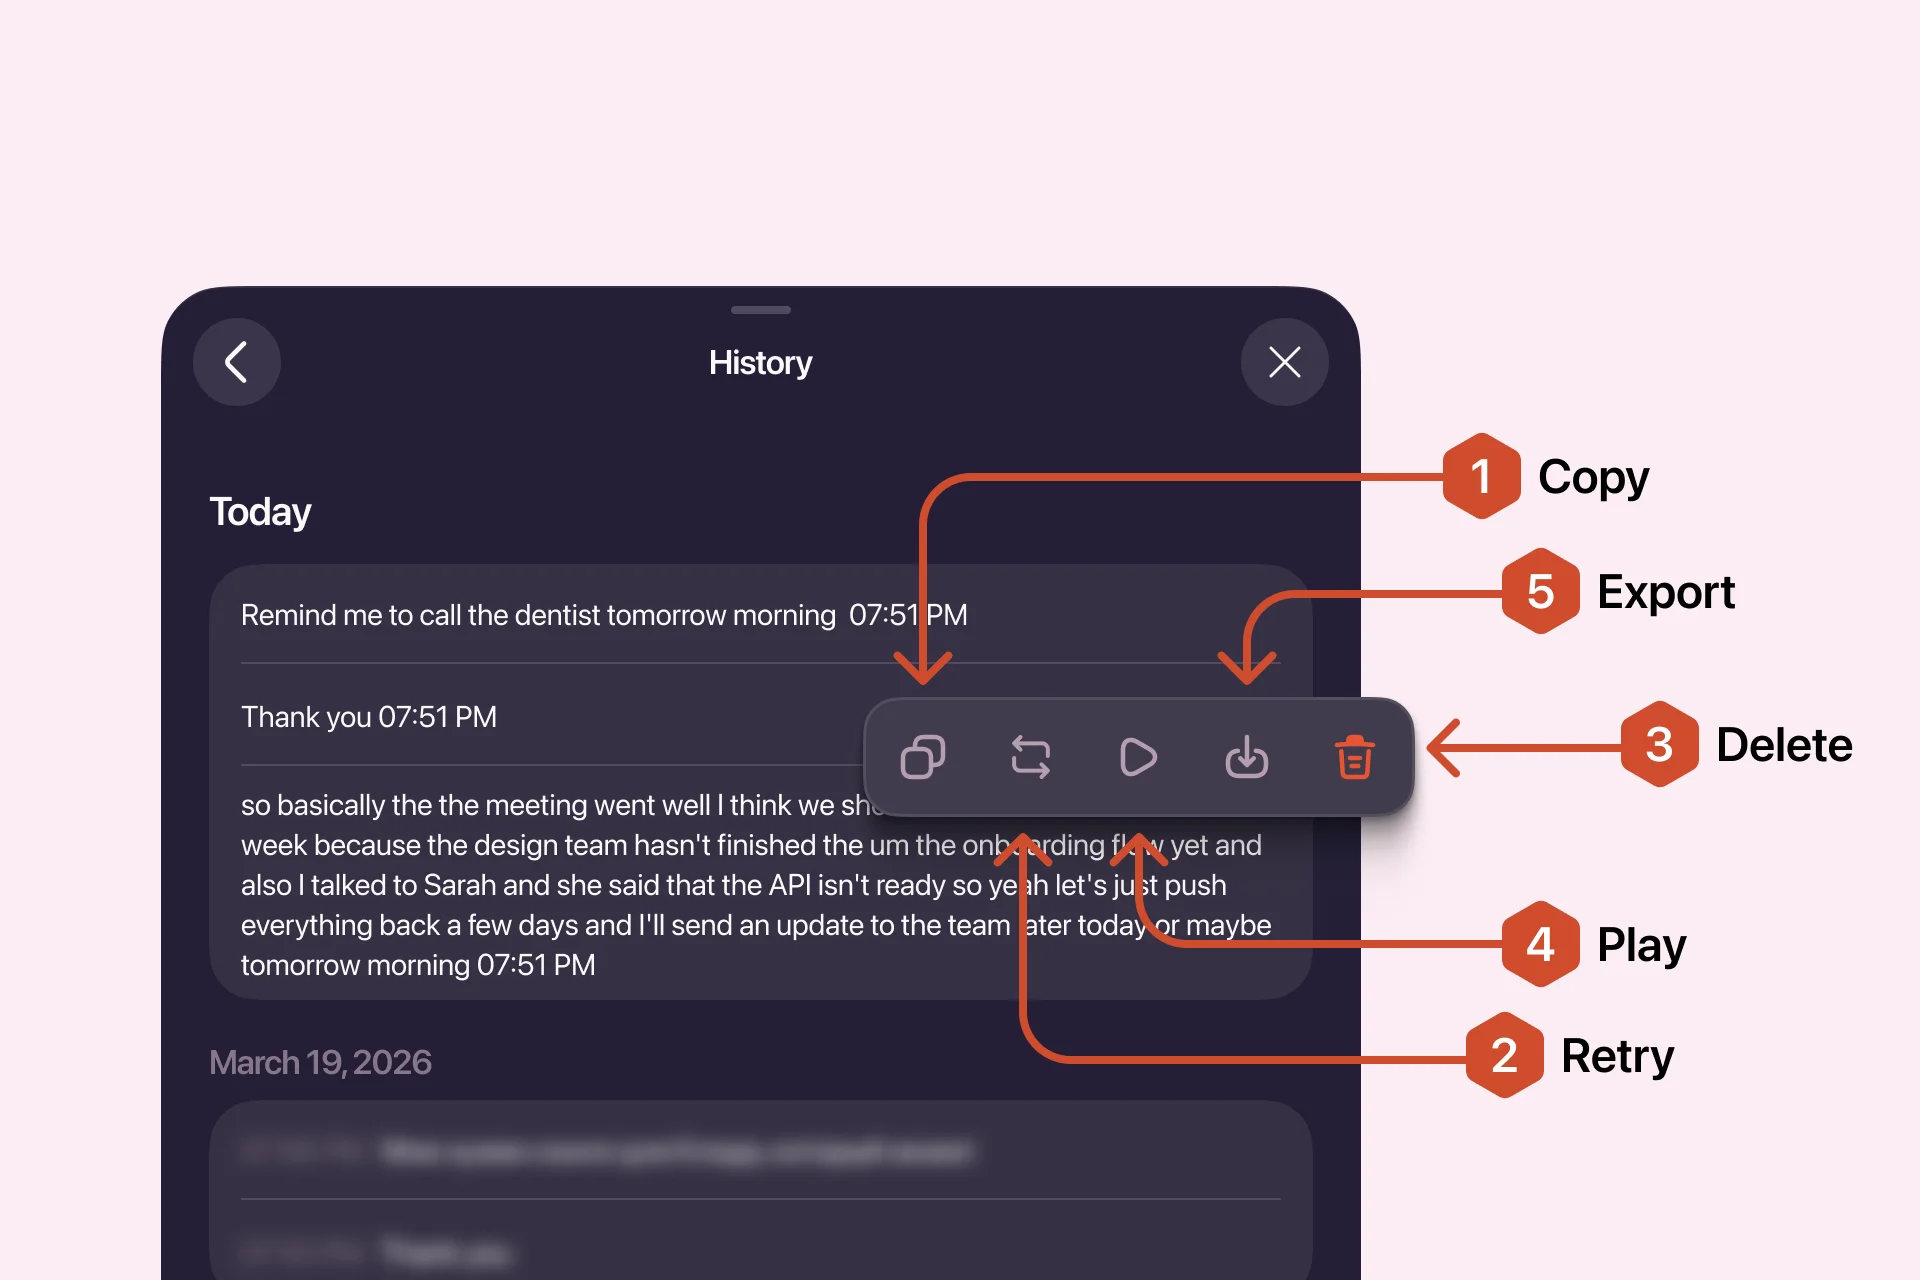
- Copy — copy the text to your clipboard
- Retry — re-run the rewrite on that dictation
- Delete — remove the entry
- Play — plays the original recording, so you can check what you actually said
- Export audio — saves the original recording as an audio file on your computer
You did it! 🎉
We hope Letterly Dictation makes writing on your PC feel faster, easier, and more natural.
Got more questions? Email us at hi@letterly.app – we’re happy to help.